<?xml version="1.0" encoding="utf-8" ?>
<feed version="0.3"
	xml:lang="ja"
	xmlns="http://purl.org/atom/ns#"
	xmlns:dc="http://purl.org/dc/elements/1.1/">
	<title>AppサポートWeb | PixelConverter en</title>
	<link rel="alternate" type="text/html" href="https://app.ognet.jp/" />
	<modified>2026-05-31T03:11:27+00:00</modified>
	<tagline><![CDATA[制作アプリの操作解説<br />
by FUMIO OGUNI]]></tagline>
	<generator url="http://serenebach.net/">Serene Bach</generator>
	<entry>
		<title>Version history</title>
		<link rel="alternate" type="text/html" href="https://app.ognet.jp/log/en/eid50.html" />
		<id>https://app.ognet.jp/log/en/eid50.html</id>
		<issued>2022-10-17T23:45:30+09:00</issued>
		<modified>2022-10-17T14:45:30Z</modified>
		<summary>v.2.3.0 (2022.10.17)- Corresponds to iOS16 and fixed some display disturbances.- Supported OS is iOS12.0 or later.v2.2.1 (2020.6.18)- Made a minor correction.v2.2.0 (2020.6.17)- A part of the UI ha...</summary>
		<author>
			<name>ognet</name>
		</author>
		<dc:subject>PixelConverter en</dc:subject>
		<content mode="escaped" type="text/html" xml:lang="ja"><![CDATA[
<p>
v.2.3.0 (2022.10.17)<br />
- Corresponds to iOS16 and fixed some display disturbances.<br />
- Supported OS is iOS12.0 or later.
</p>

<p>
v2.2.1 (2020.6.18)<br />
- Made a minor correction.
</p>

<p>
v2.2.0 (2020.6.17)<br />
- A part of the UI has been changed to match the parts for iOS13 (for iOS13 and later).<br />
- Added support for iOS13 dark mode (for iOS13 and later).<br />
- Supported OS is iOS 11.0 or later.<br />
- Added privacy policy.<br />
- Other minor changes have been made.
</p>

<p>
v2.1.0 (2018.9.26)<br />
- Unit display of each screen was unified to px, mm, cm, pt, in, pica.<br />
- Bleed size in "PAPER SIZE to PIXEL" has been made selectable from 3 types on "SETTINGS" screen. They are 3mm, 9pt, 0.125in.<br />
- It corresponds to display size of iPhone Xs Max.
</p>

<p>
v2.0.1 (2018.8.3)<br />
- Bug fixed.
</p>

<p>
v.2.0.0 (2018.8.1)<br />
- This Program is completely rewritten in Swift.<br />
- This app is now compatible with iPhone X.<br />
- This version now supports iOS 9.0 or later.<br />
- The resolution is now displayed in the conversion result of image size.<br />
- Some other bugs were fixed and texts were also modified.<br />
- An English version of this app was added.
</p>
]]></content>
	</entry>
	<entry>
		<title>About End Processing of Numerical Values in Result Display</title>
		<link rel="alternate" type="text/html" href="https://app.ognet.jp/log/en/eid122.html" />
		<id>https://app.ognet.jp/log/en/eid122.html</id>
		<issued>2022-10-17T23:45:00+09:00</issued>
		<modified>2022-10-17T14:45:00Z</modified>
		<summary>The conversion result is rounded up with the pixel value showing the minimum value, and the others are rounded down to show the maximum value (v.1.2 or later). Please refer to the log of posted sam...</summary>
		<author>
			<name>ognet</name>
		</author>
		<dc:subject>PixelConverter en</dc:subject>
		<content mode="escaped" type="text/html" xml:lang="ja"><![CDATA[
<p>
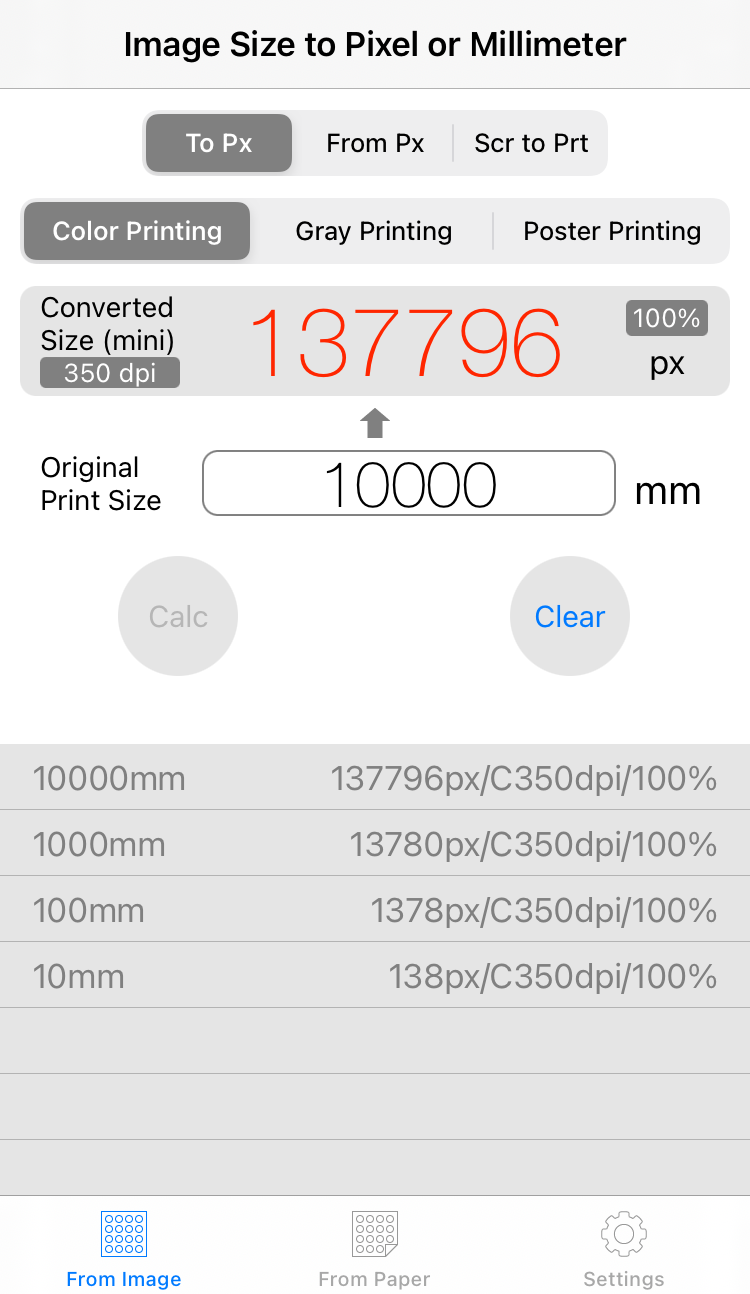
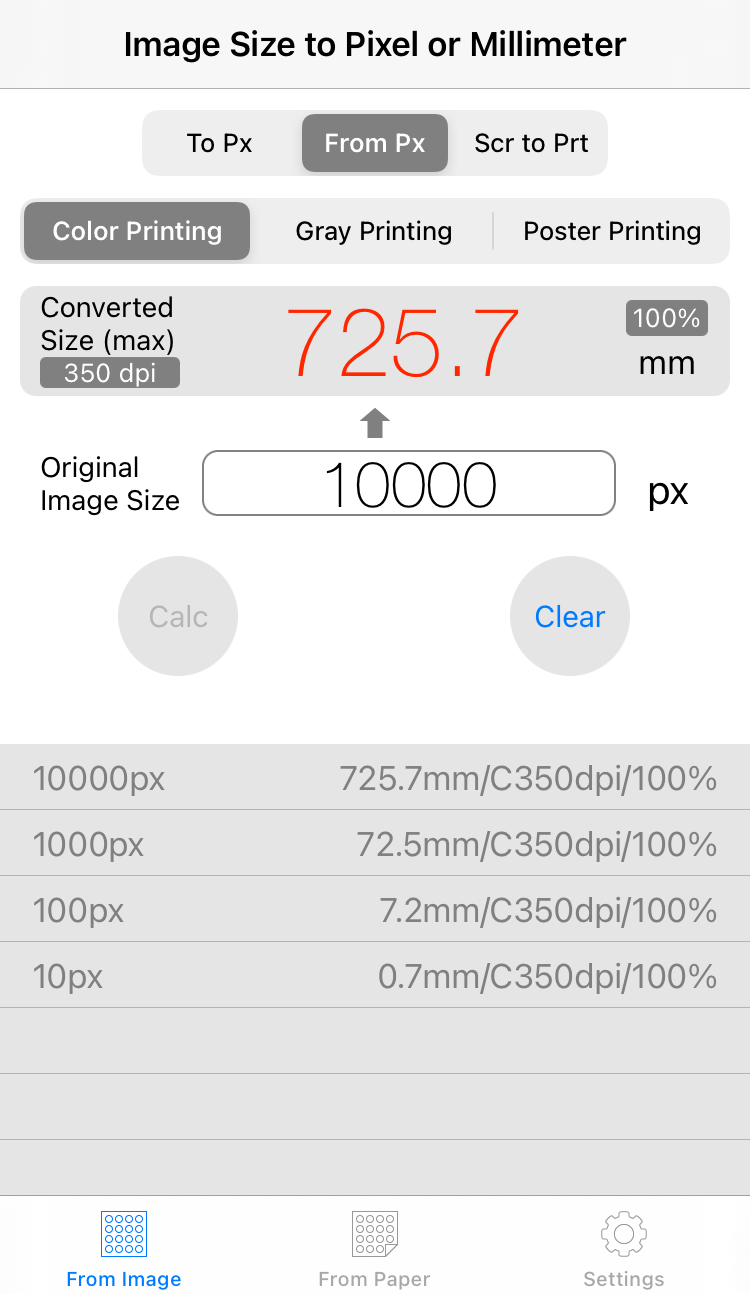
The conversion result is rounded up with the pixel value showing the minimum value, and the others are rounded down to show the maximum value (v.1.2 or later). Please refer to the log of posted samples.
</p>

<div style="text-align:center;"><h3> Round Up Result Display (pixel)</h3></div>
<img src="https://app.ognet.jp/img/screen_23e_59.png" class="pict" alt="screen_23e_59.png" title="screen_23e_59.png" width="320" border="0">

<div style="text-align:center;"><h3>Truncation Result Display<br> (mm, cm, point, inch and pica)</h3></div>
<img src="https://app.ognet.jp/img/screen_23e_60.png" class="pict" alt="screen_23e_60.png" title="screen_23e_60.png" width="320" border="0">
]]></content>
	</entry>
	<entry>
		<title>Settings: Bleed Size Selection</title>
		<link rel="alternate" type="text/html" href="https://app.ognet.jp/log/en/eid121.html" />
		<id>https://app.ognet.jp/log/en/eid121.html</id>
		<issued>2022-10-17T23:44:54+09:00</issued>
		<modified>2022-10-17T14:44:54Z</modified>
		<summary>You can select bleed size (unit) in the &quot;From Paper&quot; screen from 3 types (v 2.1 or later).(1) Select &quot;Settings&quot; in the lower tab menu. Tap &quot;Size&quot; of &quot;BLEED&quot;.(2) Choose an arbitrary size from the ch...</summary>
		<author>
			<name>ognet</name>
		</author>
		<dc:subject>PixelConverter en</dc:subject>
		<content mode="escaped" type="text/html" xml:lang="ja"><![CDATA[
<p>
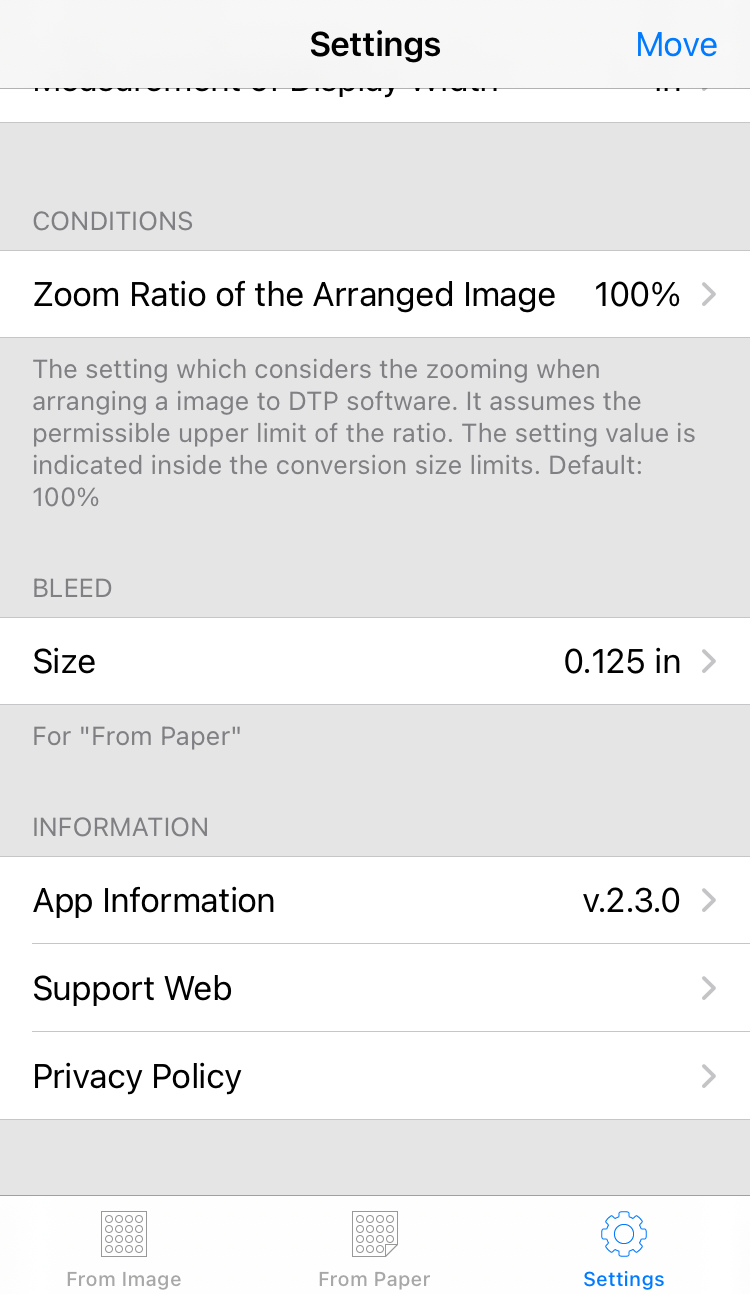
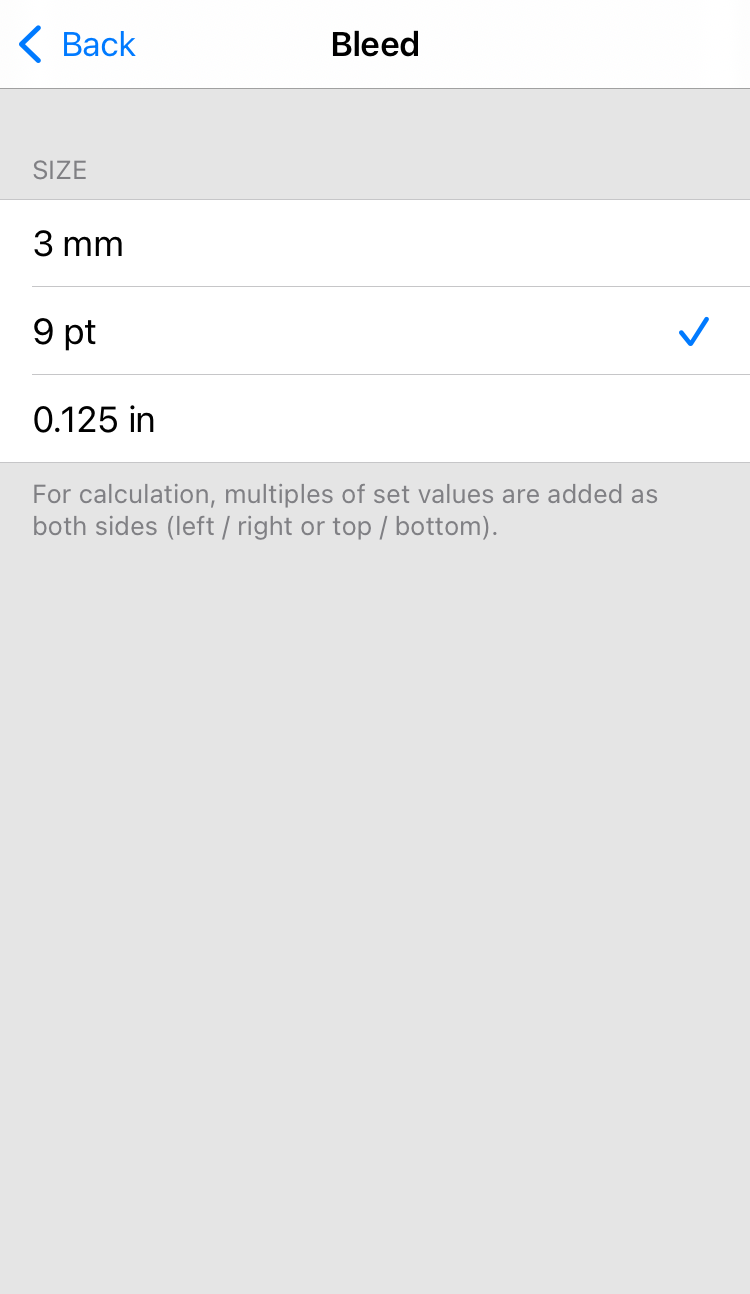
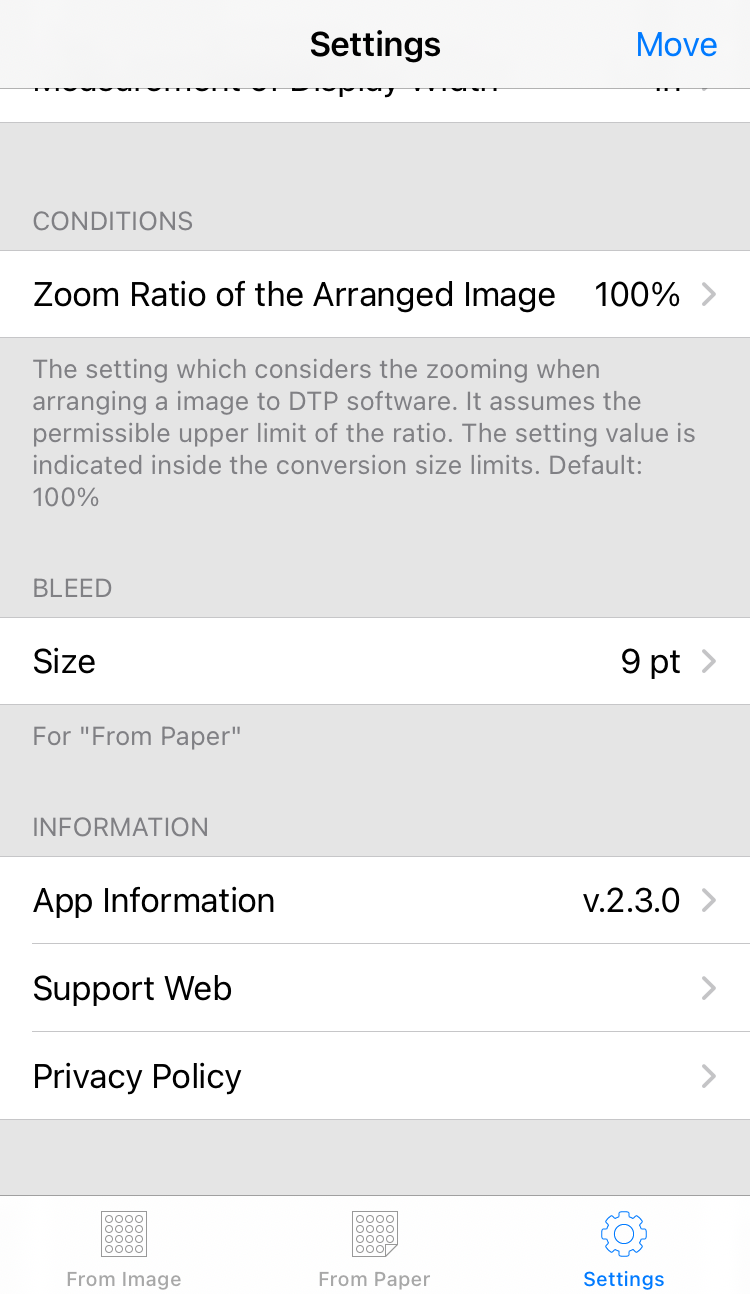
You can select bleed size (unit) in the "From Paper" screen from 3 types (v 2.1 or later).
</p>

<p>
(1) Select "Settings" in the lower tab menu. Tap "Size" of "BLEED".<br />
<img src="https://app.ognet.jp/img/screen_23e_55.png" class="pict" alt="screen_23e_55.png" title="screen_23e_55.png" width="320" border="0">
</p>

<p>
(2) Choose an arbitrary size from the choices.<br />
<img src="https://app.ognet.jp/img/screen_23e_56.png" class="pict" alt="screen_23e_56.png" title="screen_23e_56.png" width="320" border="0">
</p>

<p>
(3) Tap "Back" to confirm the change is reflected. On the "From Paper" screen, it is displayed to the right of the bleed segment.<br />
<img src="https://app.ognet.jp/img/screen_23e_57.png" class="pict" alt="screen_23e_57.png" title="screen_23e_57.png" width="320" border="0">
</p>

<div style="text-align:center;">Screen of "From Paper"</div>
<img src="https://app.ognet.jp/img/screen_23e_58.png" class="pict" alt="screen_23e_58.png" title="screen_23e_58.png" width="320" border="0">

<p>
※Bleed is added in multiples of the set value both in left and right or top and bottom.<br />
※9 pt and 0.125 in are the same size. 3 mm is slightly smaller than these, there are 3 to 5 pixels difference depending on the resolution. This relationship is as follows. 3 mm < 9 pt = 0.125 in
</p>
]]></content>
	</entry>
	<entry>
		<title>Settings: Move Segment Items</title>
		<link rel="alternate" type="text/html" href="https://app.ognet.jp/log/en/eid120.html" />
		<id>https://app.ognet.jp/log/en/eid120.html</id>
		<issued>2022-10-17T23:44:49+09:00</issued>
		<modified>2022-10-17T14:44:49Z</modified>
		<summary>You can rearrange the display order for print types and display segment items. Change is done by &quot;Move&quot; of Settings screen.(1) Select &quot;Settings&quot; in the lower tab menu. Tap &quot;Move&quot; button on the top ...</summary>
		<author>
			<name>ognet</name>
		</author>
		<dc:subject>PixelConverter en</dc:subject>
		<content mode="escaped" type="text/html" xml:lang="ja"><![CDATA[
<p>
You can rearrange the display order for print types and display segment items. Change is done by "Move" of Settings screen.
</p>

<p>
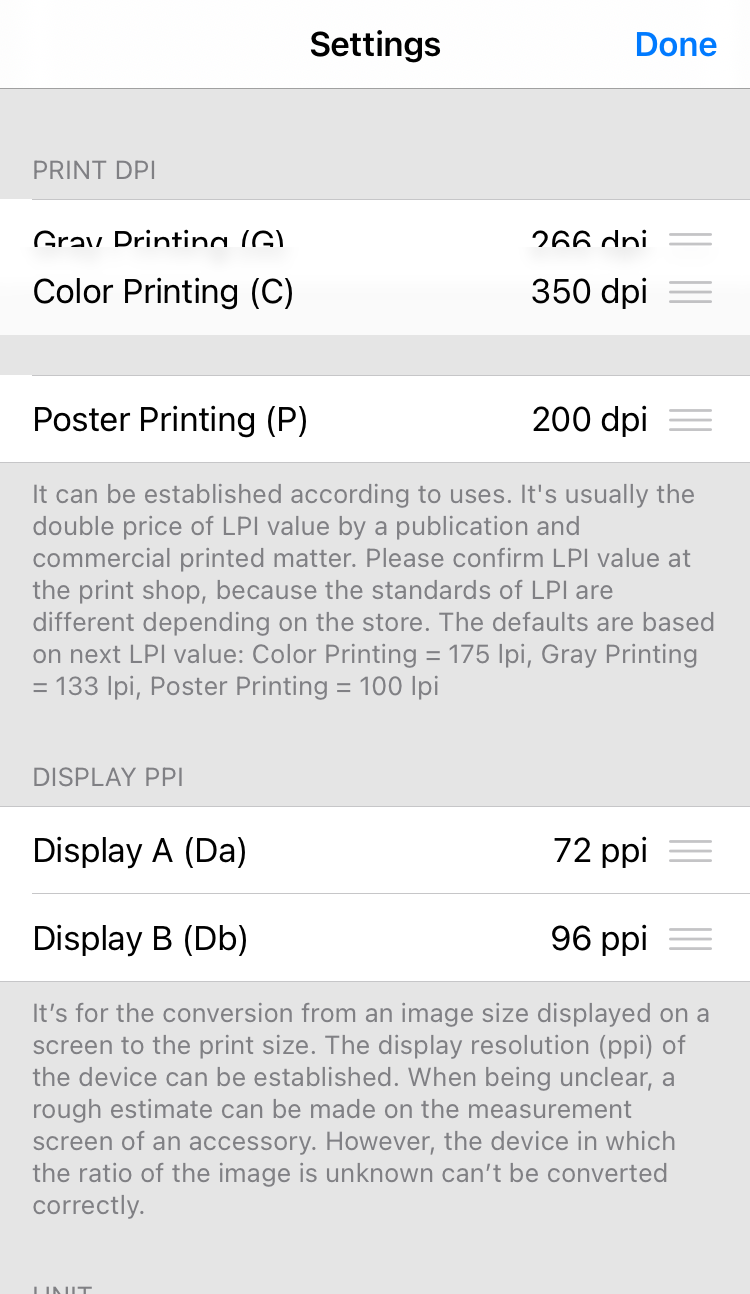
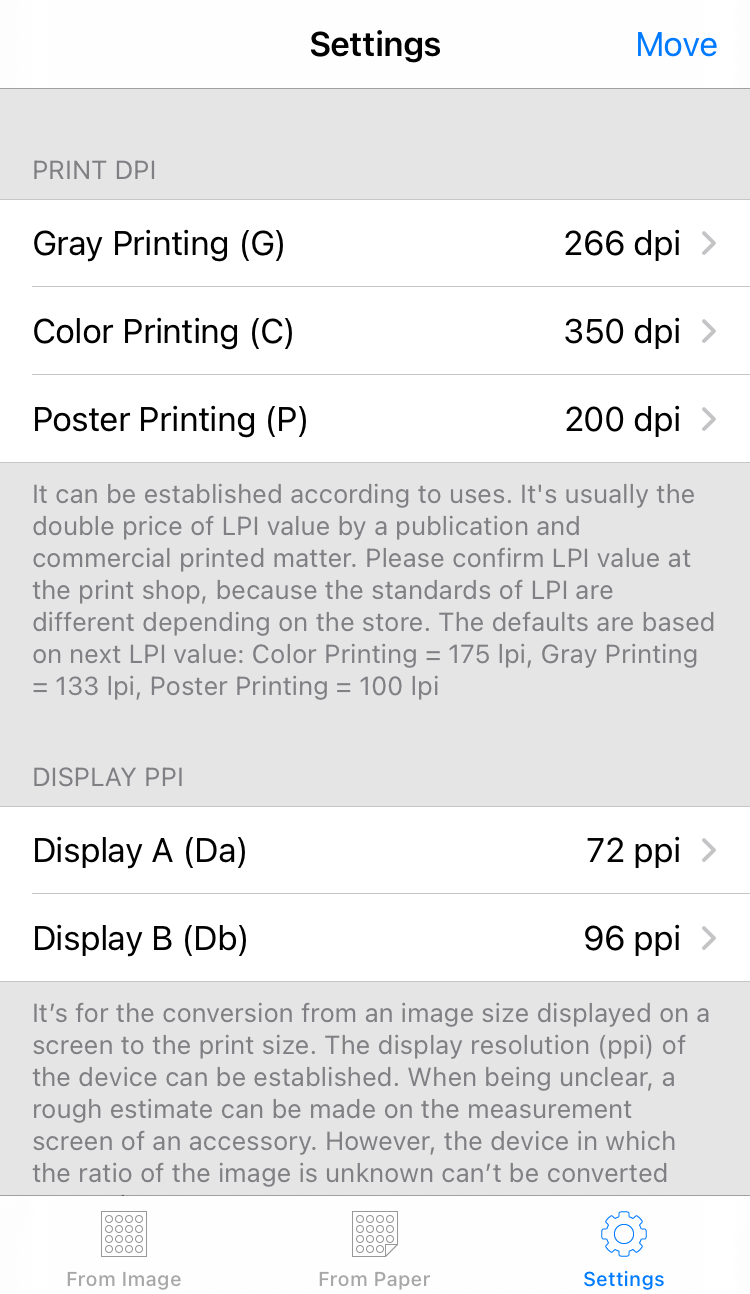
(1) Select "Settings" in the lower tab menu. Tap "Move" button on the top navigation bar.<br />
<img src="https://app.ognet.jp/img/screen_23e_03.png" class="pict" alt="screen_23e_03.png" title="screen_23e_03.png" width="320" border="0">
</p>

<p>
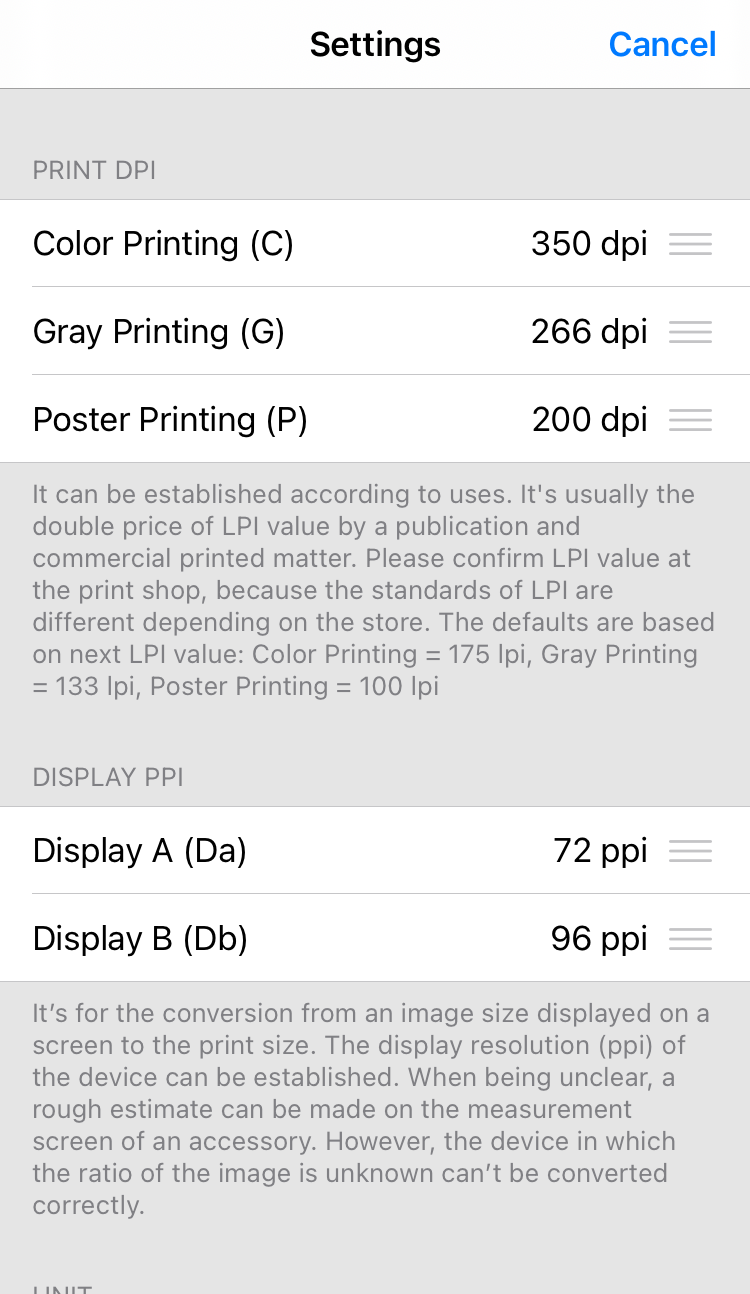
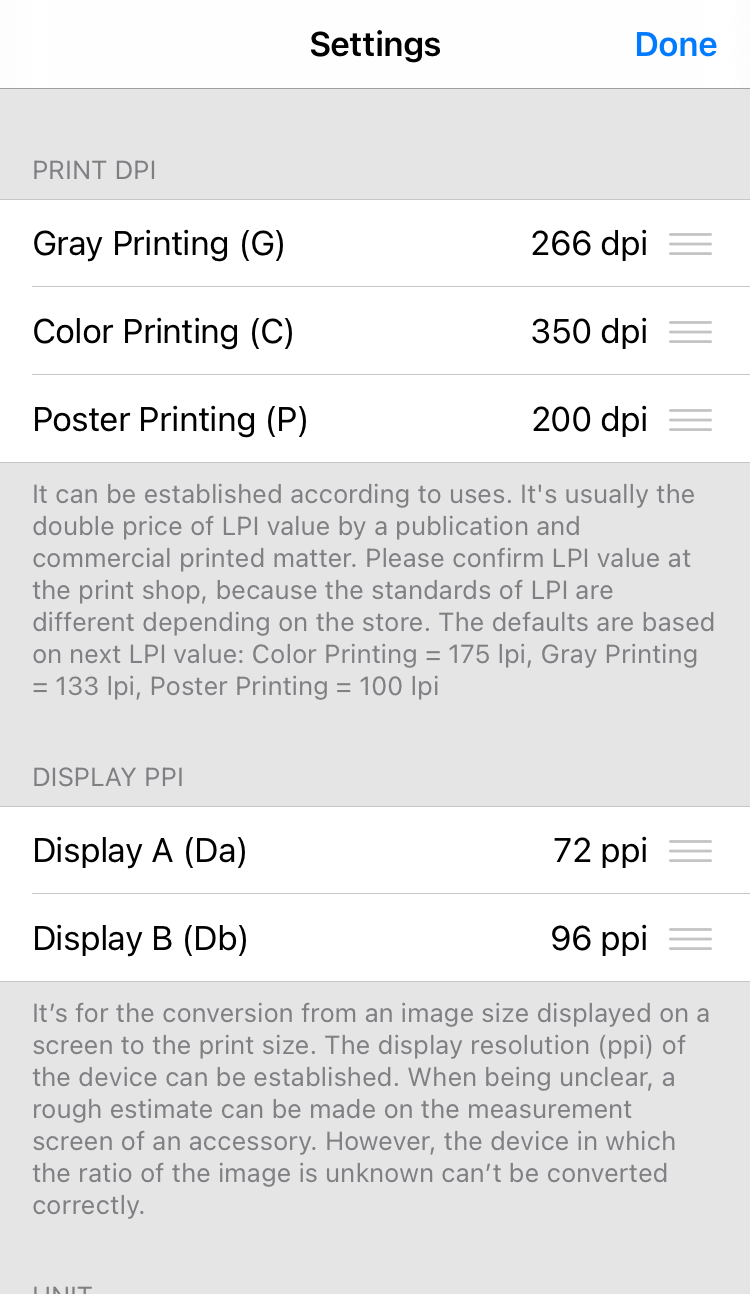
(2) A movement mark will appear at the right end of the movable item.<br />
<img src="https://app.ognet.jp/img/screen_23e_49.png" class="pict" alt="screen_23e_49.png" title="screen_23e_49.png" width="320" border="0">
</p>

(3) Drag the movement mark of the item you want to move to the position you want to move.
<img src="https://app.ognet.jp/img/screen_23e_50.png" class="pict" alt="screen_23e_50.png" title="screen_23e_50.png" width="320" border="0">
<div style="text-align:center;">↓</div>
<img src="https://app.ognet.jp/img/screen_23e_51.png" class="pict" alt="screen_23e_51.png" title="screen_23e_51.png" width="320" border="0">

<p>
(4) Tap "Done" and confirm the change is reflected.<br />
<img src="https://app.ognet.jp/img/screen_23e_52.png" class="pict" alt="screen_23e_52.png" title="screen_23e_52.png" width="320" border="0">
</p>

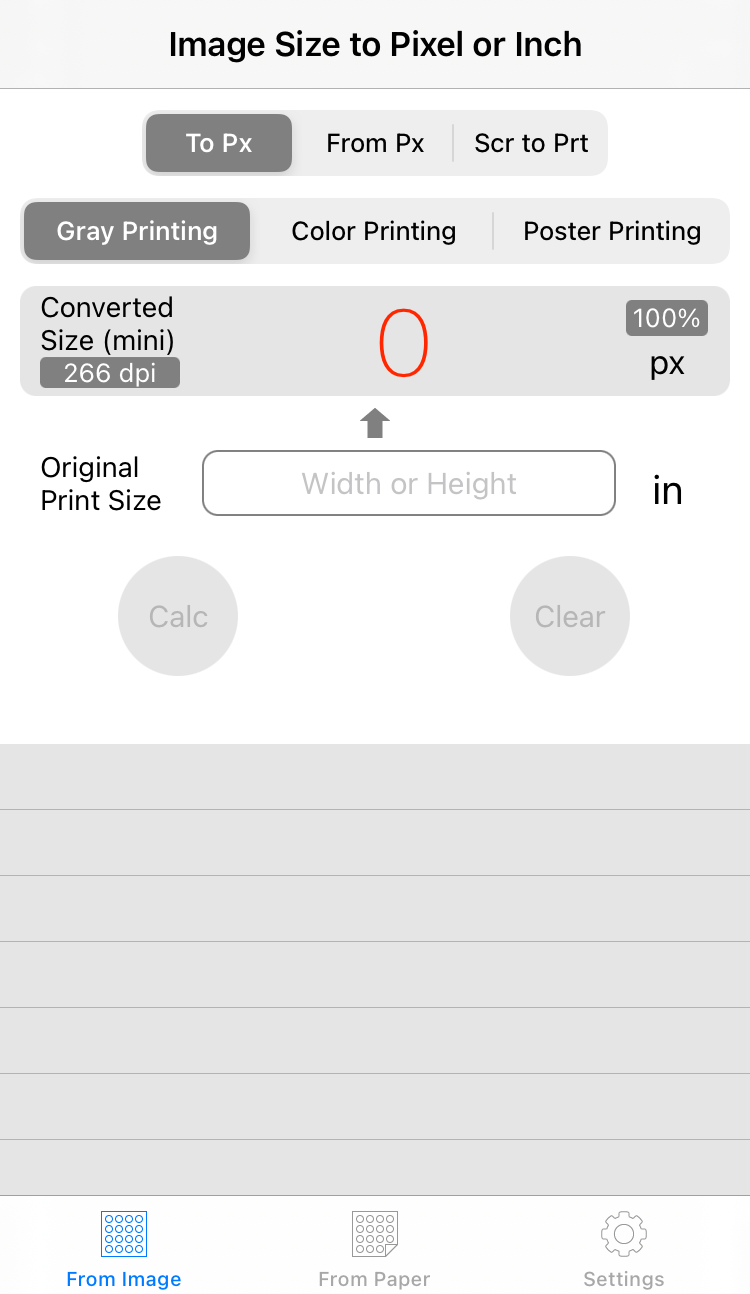
<div style="text-align:center;">Screen of "From Image"</div>
<img src="https://app.ognet.jp/img/screen_23e_53.png" class="pict" alt="screen_23e_53.png" title="screen_23e_53.png" width="320" border="0">
<div style="text-align:center;">Screen of "From Paper"</div>
<img src="https://app.ognet.jp/img/screen_23e_54.png" class="pict" alt="screen_23e_54.png" title="screen_23e_54.png" width="320" border="0">
]]></content>
	</entry>
	<entry>
		<title>Settings: Zoom Ratio of the Arranged Image</title>
		<link rel="alternate" type="text/html" href="https://app.ognet.jp/log/en/eid119.html" />
		<id>https://app.ognet.jp/log/en/eid119.html</id>
		<issued>2022-10-17T23:44:45+09:00</issued>
		<modified>2022-10-17T14:44:45Z</modified>
		<summary>When arranging images in DTP software etc., the zoom ratio allowed as original rules may be fixed. You can add that rule to the conversion condition (v.1.2 or later).(1) Select &quot;Settings&quot; in the lo...</summary>
		<author>
			<name>ognet</name>
		</author>
		<dc:subject>PixelConverter en</dc:subject>
		<content mode="escaped" type="text/html" xml:lang="ja"><![CDATA[
<p>
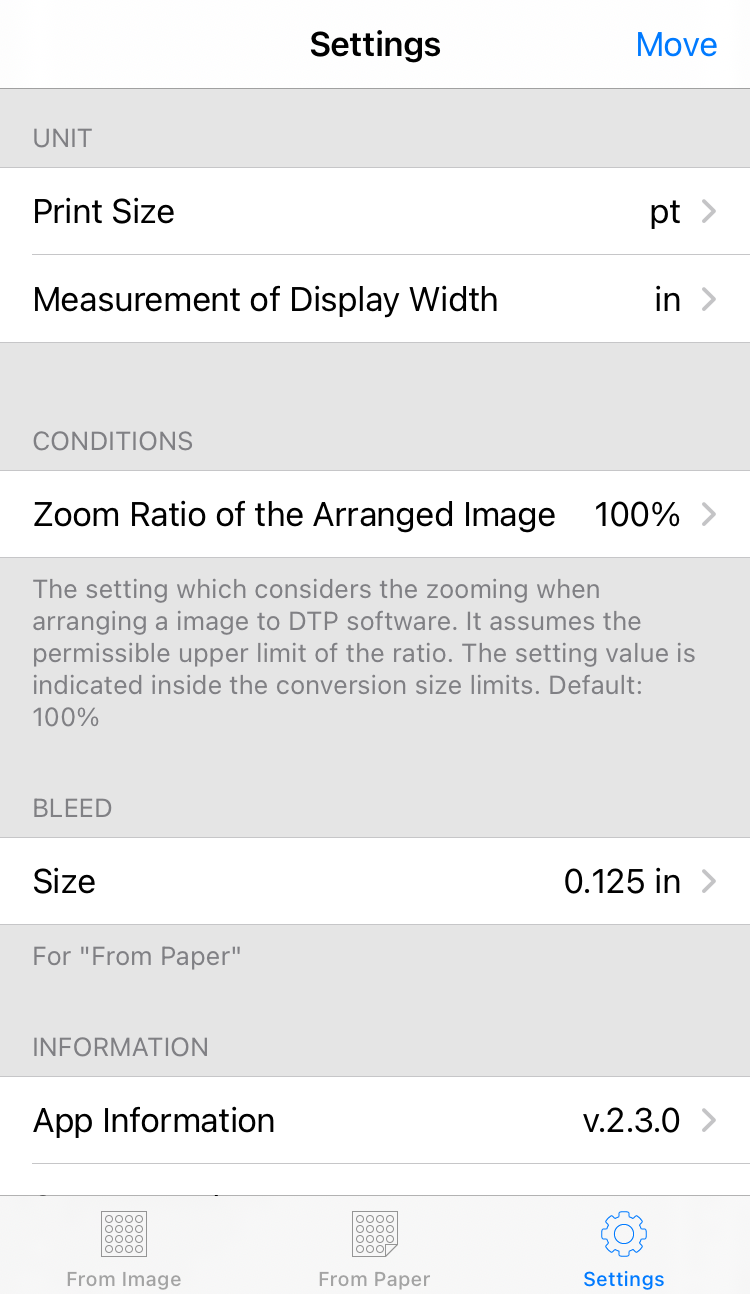
When arranging images in DTP software etc., the zoom ratio allowed as original rules may be fixed. You can add that rule to the conversion condition (v.1.2 or later).
</p>

<p>
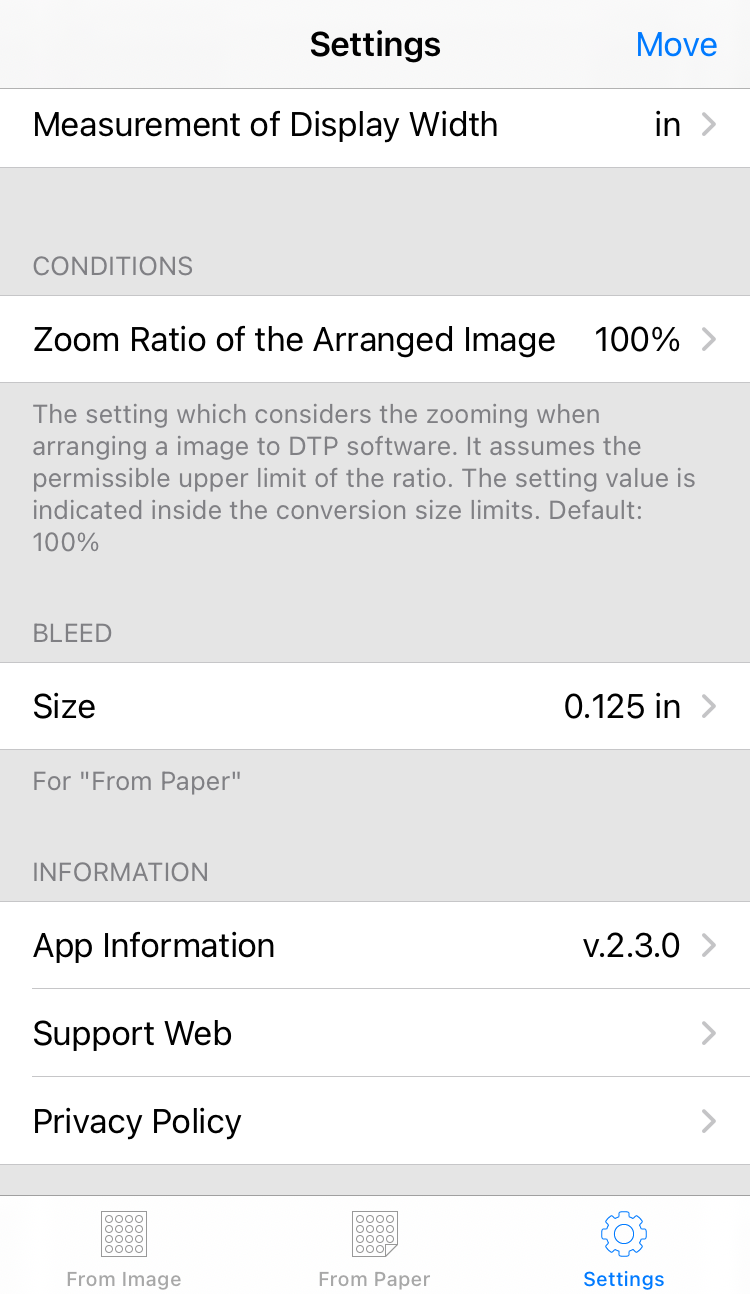
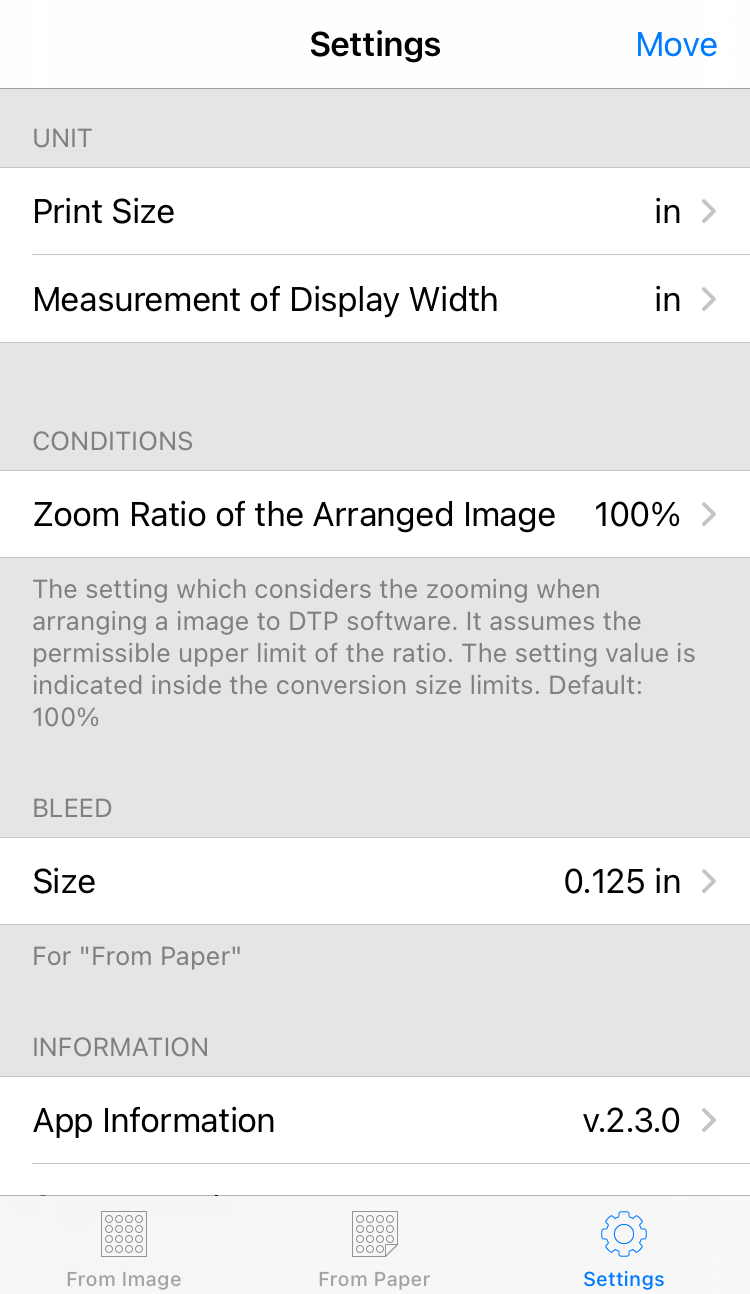
(1) Select "Settings" in the lower tab menu. Scroll down to "CONDITIONS".<br />
<img src="https://app.ognet.jp/img/screen_23e_41.png" class="pict" alt="screen_23e_41.png" title="screen_23e_41.png" width="320" border="0">
</p>

<p>
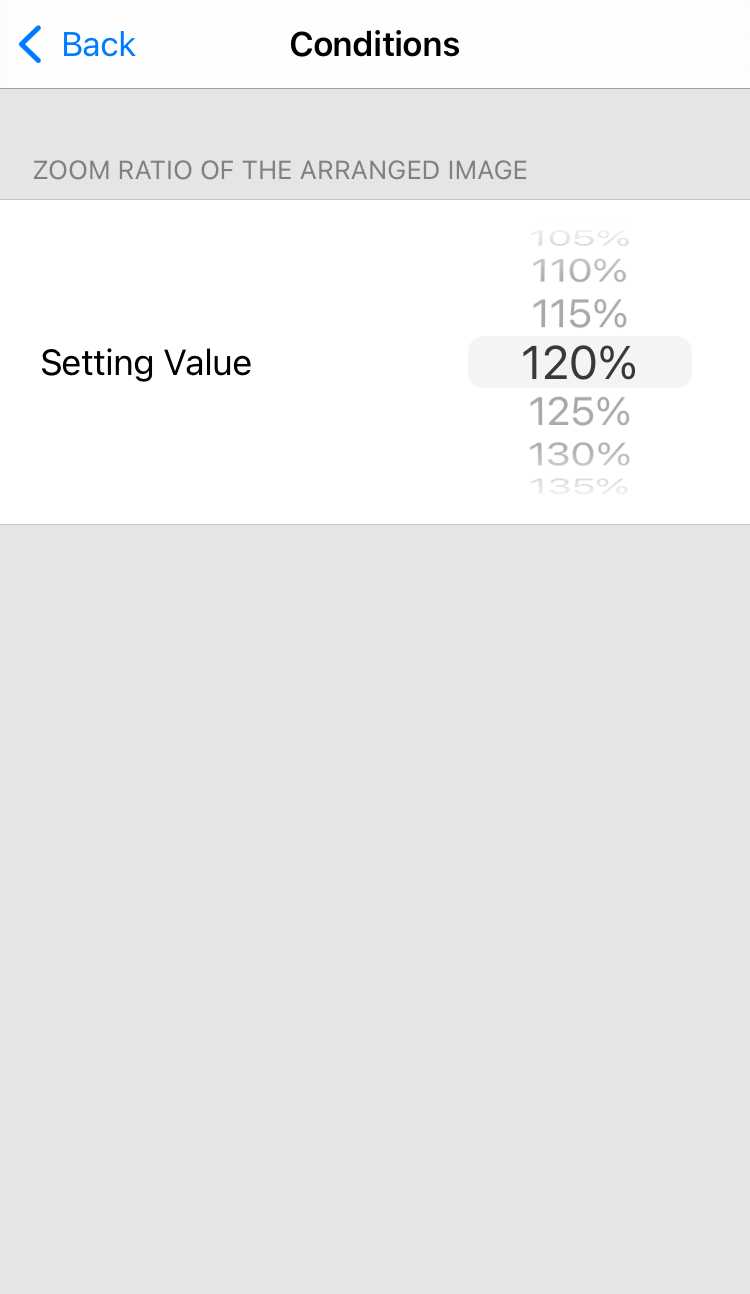
(2) Tap "Zoom Ratio of the Arranged Image" and select the ratio to be changed with the picker.<br />
<img src="https://app.ognet.jp/img/screen_23e_42.png" class="pict" alt="screen_23e_42.png" title="screen_23e_42.png" width="320" border="0">
</p>

<p>
(3) Go back to the Settings screen and confirm the change is reflected.<br />
<img src="https://app.ognet.jp/img/screen_23e_43.png" class="pict" alt="screen_23e_43.png" title="screen_23e_43.png" width="320" border="0">
</p>

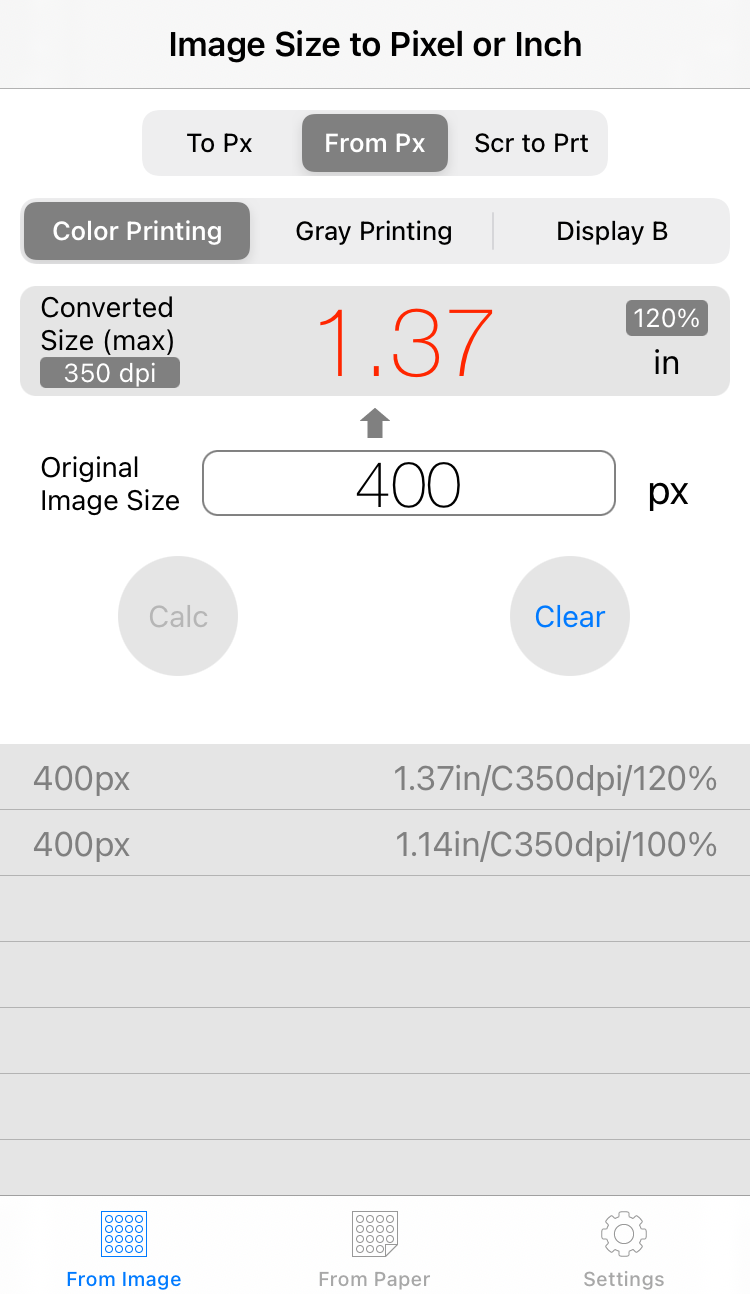
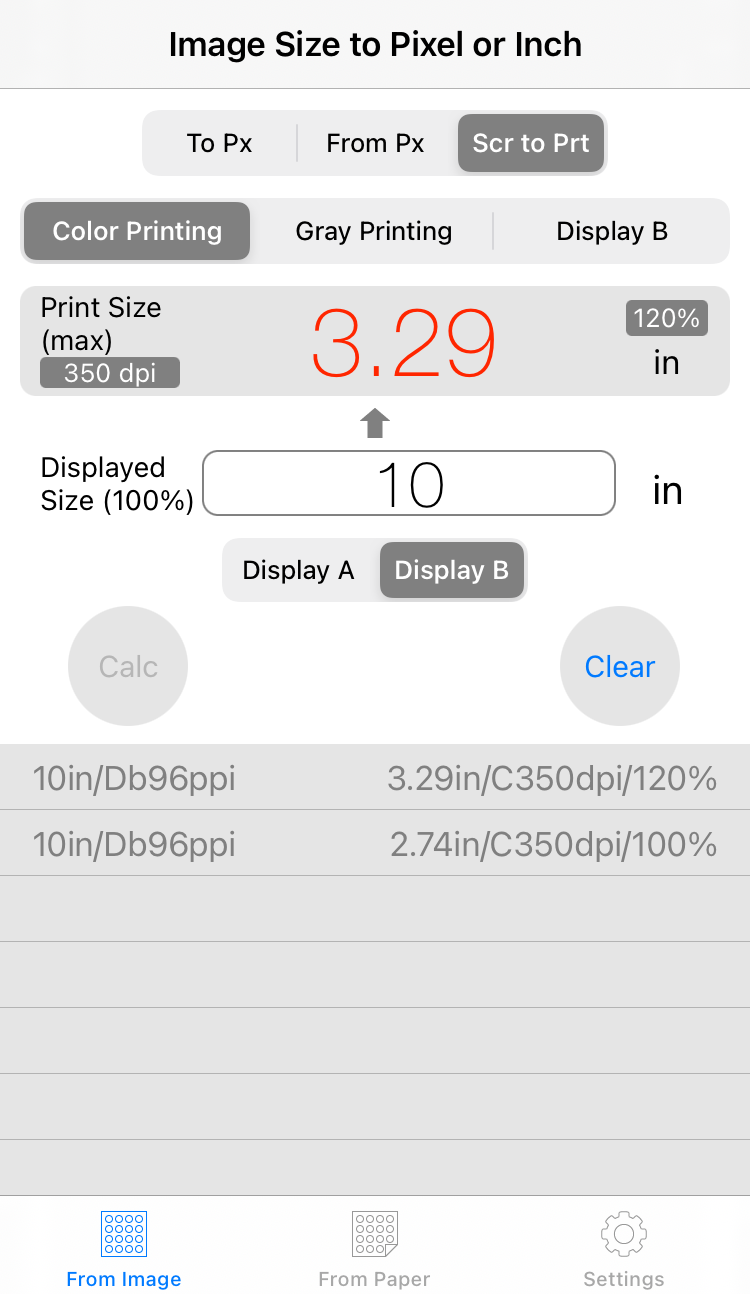
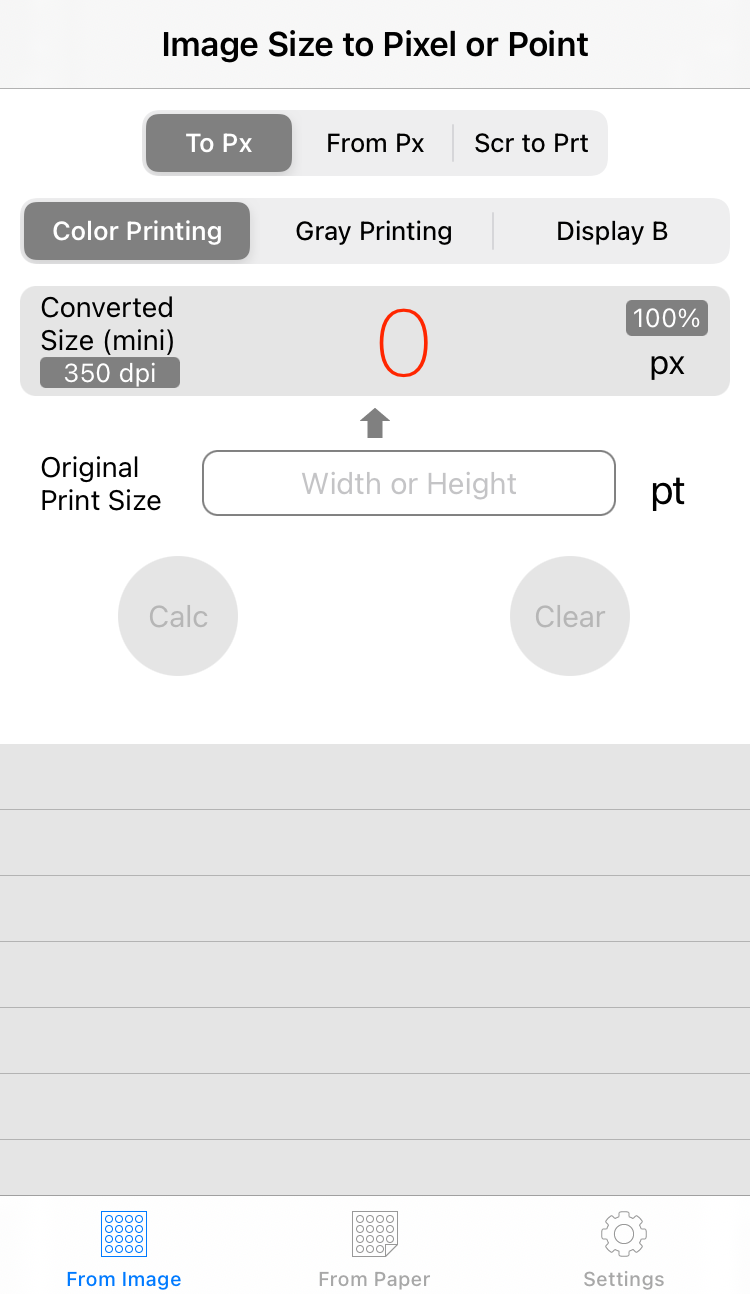
(4) The setting value is displayed on the right side of the conversion result frame. The difference between the conversion results is shown below. Please pay attention to the log.
<div style="text-align:center;">To Px</div>
<img src="https://app.ognet.jp/img/screen_23e_44.png" class="pict" alt="screen_23e_44.png" title="screen_23e_44.png" width="320" border="0">
<div style="text-align:center;">From Px</div>
<img src="https://app.ognet.jp/img/screen_23e_45.png" class="pict" alt="screen_23e_45.png" title="screen_23e_45.png" width="320" border="0">
<div style="text-align:center;">Scr to Prt</div>
<img src="https://app.ognet.jp/img/screen_23e_46.png" class="pict" alt="screen_23e_46.png" title="screen_23e_46.png" width="320" border="0">

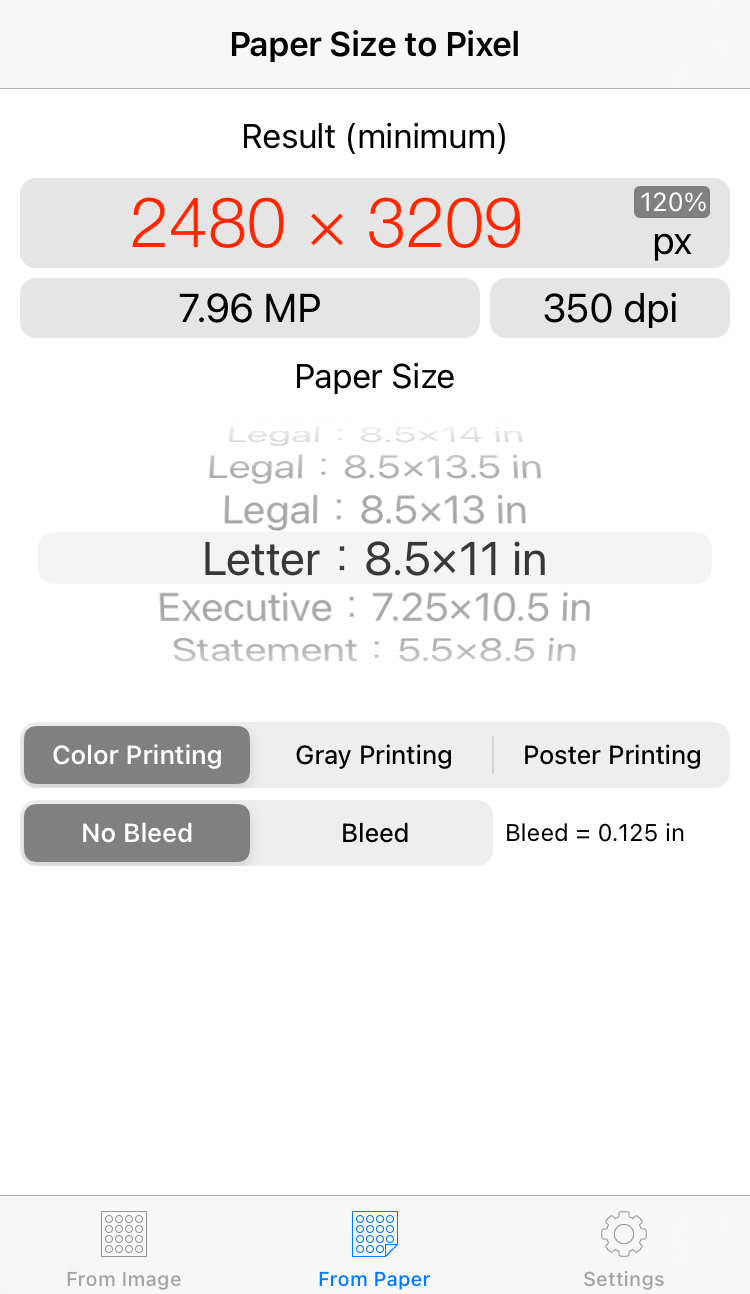
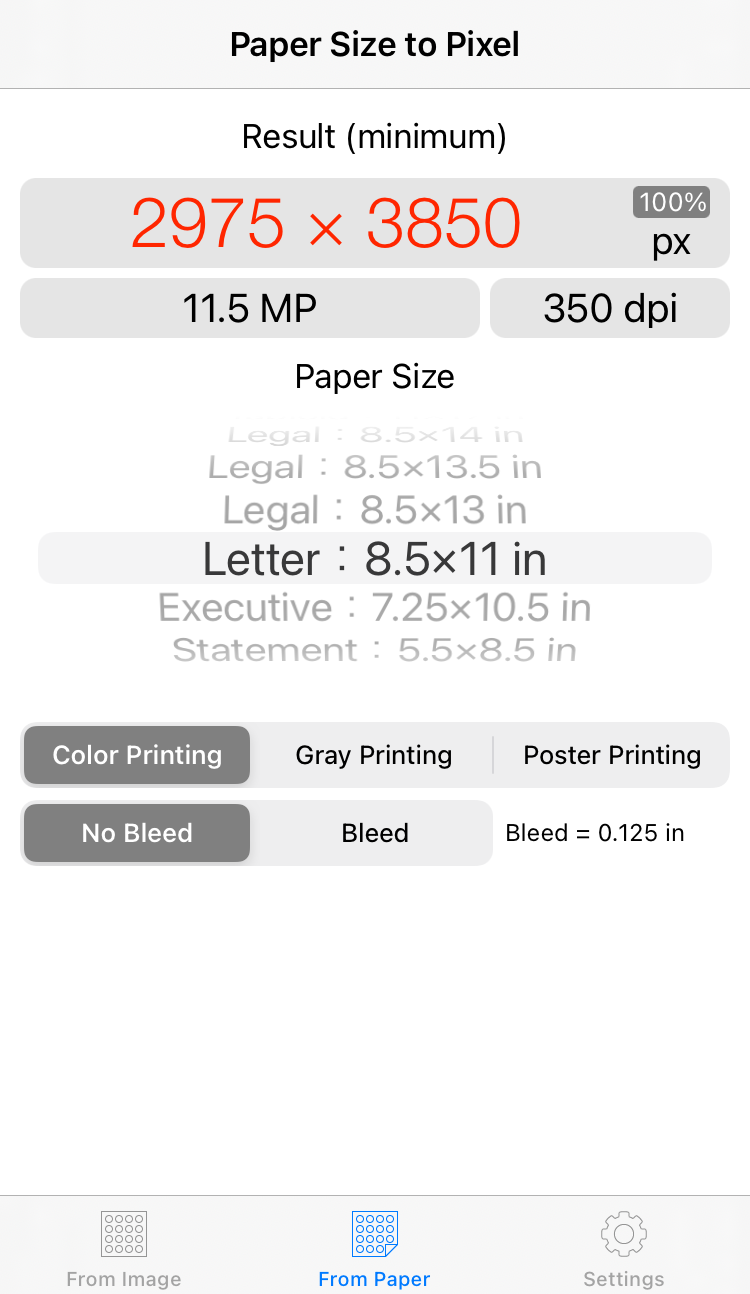
(5) The difference depending on the zoom ratio of paper size conversion result is shown below.
<div style="text-align:center;">120%</div>
<img src="https://app.ognet.jp/img/screen_23e_47.png" class="pict" alt="screen_23e_47.png" title="screen_23e_47.png" width="320" border="0">
<div style="text-align:center;">100%</div>
<img src="https://app.ognet.jp/img/screen_23e_48.png" class="pict" alt="screen_23e_48.png" title="screen_23e_48.png" width="320" border="0">

<p>
- The pixel value is a value that becomes the same number of dots as 100% when placed at the specified zoom ratio. The conversion result is small if it is for expansion, and it becomes larger if it is for reduction.<br />
ex. 998 px x 120% = 1197 px (= 100% size)<br />
- The conversion value of the designated unit such as mm is the value multiplied by the setting zoom ratio to the size when the zoom ratio is 100%.<br />
ex. 1.14 in (100%) x 120% = 1.37 in<br />
- Due to the end processing of the value, the calculation may not be matched by comparing only the display result.
</p>
]]></content>
	</entry>
	<entry>
		<title>Settings: Unit</title>
		<link rel="alternate" type="text/html" href="https://app.ognet.jp/log/en/eid118.html" />
		<id>https://app.ognet.jp/log/en/eid118.html</id>
		<issued>2022-10-17T23:44:39+09:00</issued>
		<modified>2022-10-17T14:44:39Z</modified>
		<summary>(1) Select &quot;Settings&quot; in the lower tab menu. Scroll down to &quot;UNIT&quot;.(2) Tap the unit you want to change. There will be a checkmark.(3) Go back to the Settings screen and confirm the change is reflec...</summary>
		<author>
			<name>ognet</name>
		</author>
		<dc:subject>PixelConverter en</dc:subject>
		<content mode="escaped" type="text/html" xml:lang="ja"><![CDATA[
<p>
(1) Select "Settings" in the lower tab menu. Scroll down to "UNIT".<br />
<img src="https://app.ognet.jp/img/screen_23e_37.png" class="pict" alt="screen_23e_37.png" title="screen_23e_37.png" width="320" border="0">
</p>

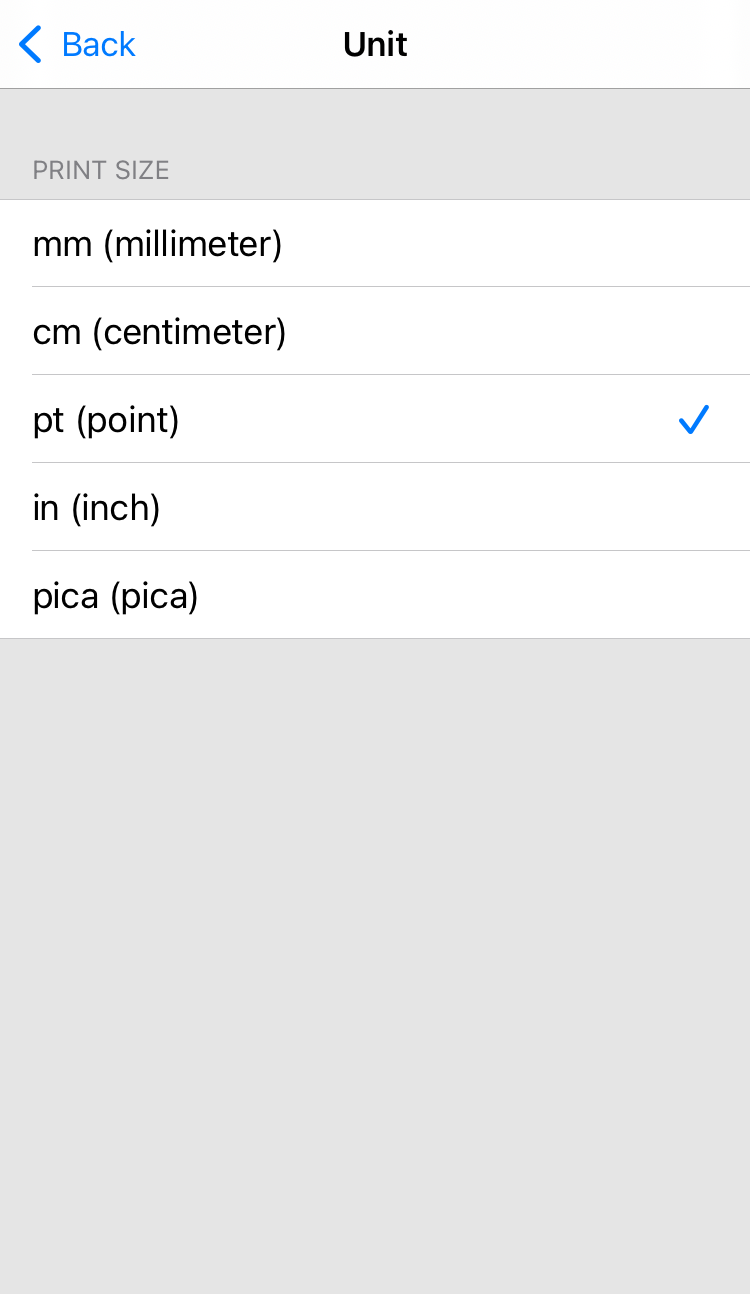
(2) Tap the unit you want to change. There will be a checkmark.
<img src="https://app.ognet.jp/img/screen_23e_38.png" class="pict" alt="screen_23e_38.png" title="screen_23e_38.png" width="320" border="0">
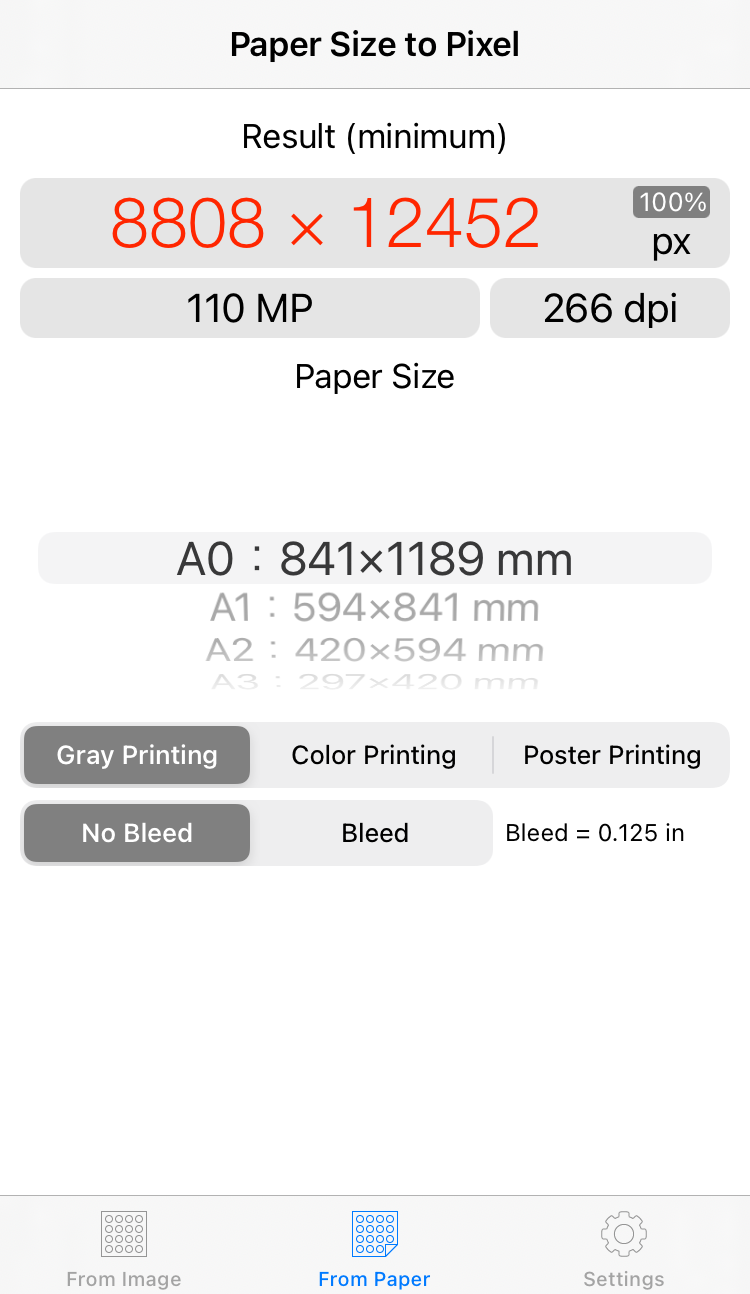
(3) Go back to the Settings screen and confirm the change is reflected.
<img src="https://app.ognet.jp/img/screen_23e_39.png" class="pict" alt="screen_23e_39.png" title="screen_23e_39.png" width="320" border="0">
<div style="text-align:center;">Screen of "From Image"</div>
<img src="https://app.ognet.jp/img/screen_23e_40.png" class="pict" alt="screen_23e_40.png" title="screen_23e_40.png" width="320" border="0">
]]></content>
	</entry>
	<entry>
		<title>Settings: Use Display as Conversion Target Device</title>
		<link rel="alternate" type="text/html" href="https://app.ognet.jp/log/en/eid117.html" />
		<id>https://app.ognet.jp/log/en/eid117.html</id>
		<issued>2022-10-17T23:44:33+09:00</issued>
		<modified>2022-10-17T14:44:33Z</modified>
		<summary>One of the DISPLAY PPI settings has &quot;Use as a Conversion Target&quot; option. When this setting is turned on, the third index of the print resolution segment on the &quot;From Image&quot; screen is replaced with ...</summary>
		<author>
			<name>ognet</name>
		</author>
		<dc:subject>PixelConverter en</dc:subject>
		<content mode="escaped" type="text/html" xml:lang="ja"><![CDATA[
<p>
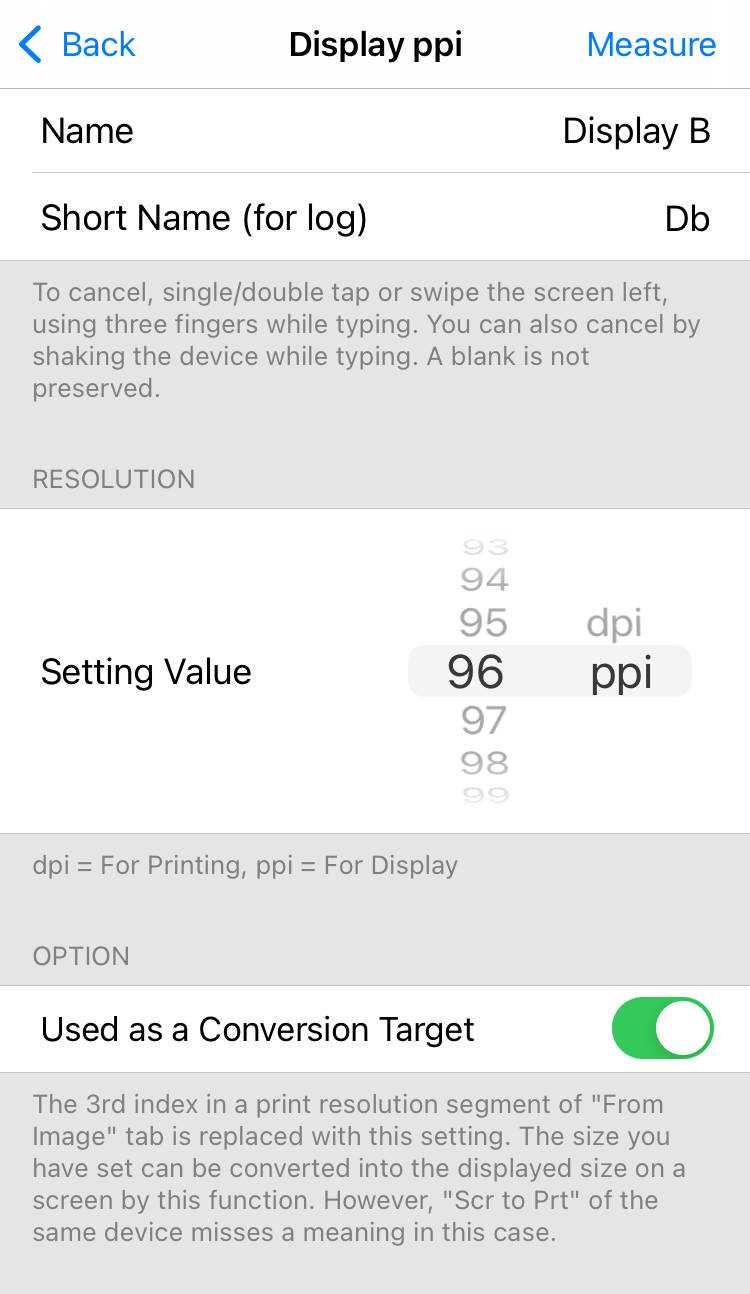
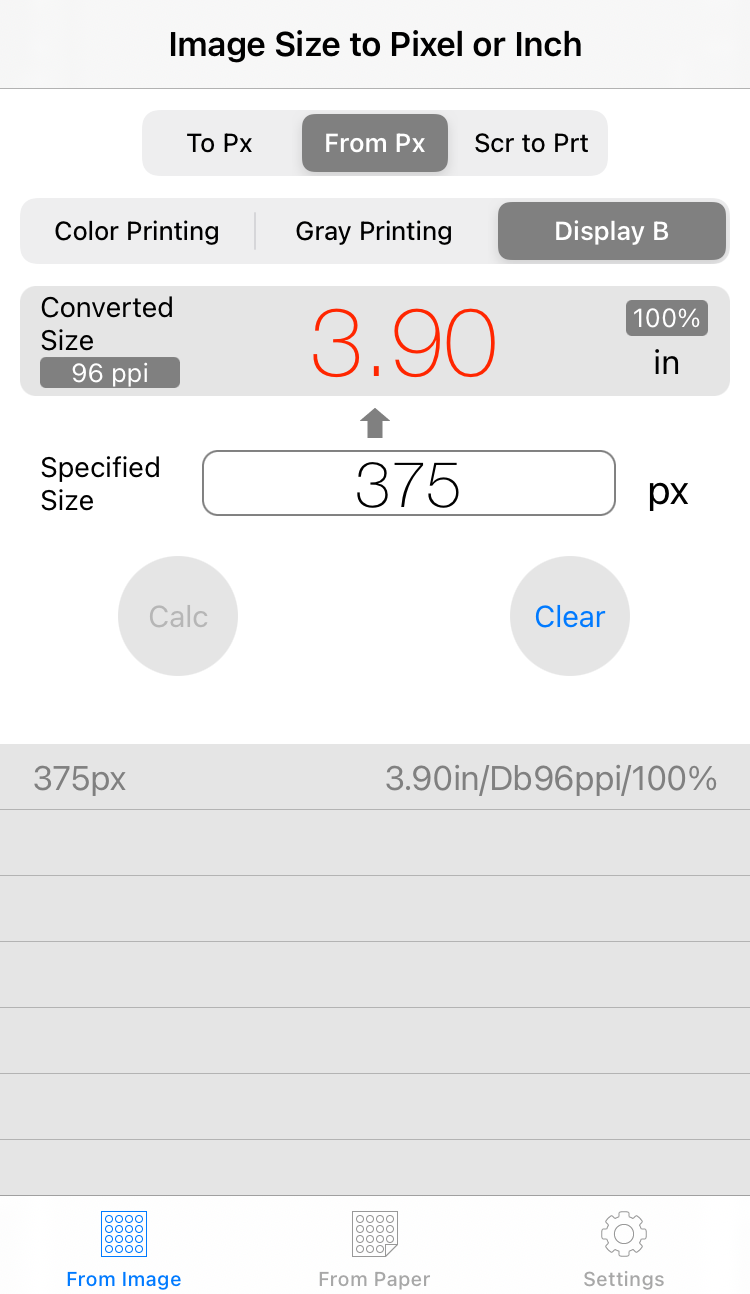
One of the DISPLAY PPI settings has "Use as a Conversion Target" option. When this setting is turned on, the third index of the print resolution segment on the "From Image" screen is replaced with this setting. This allows you to convert any size to the display size on the setting display (v1.4 or later).<br />
For example, convert 375 pixels to inch size on the display. It helps to check the size of the smartphone screen in website creation.
</p>

<p>
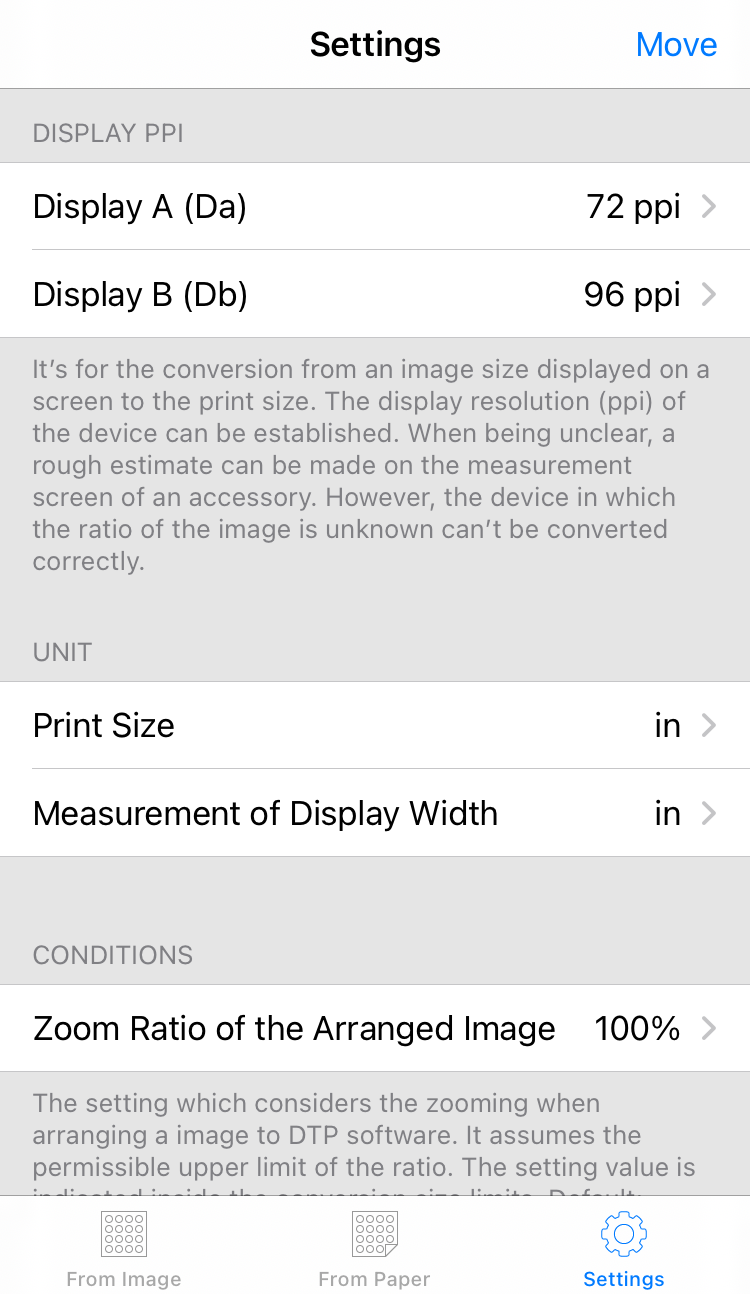
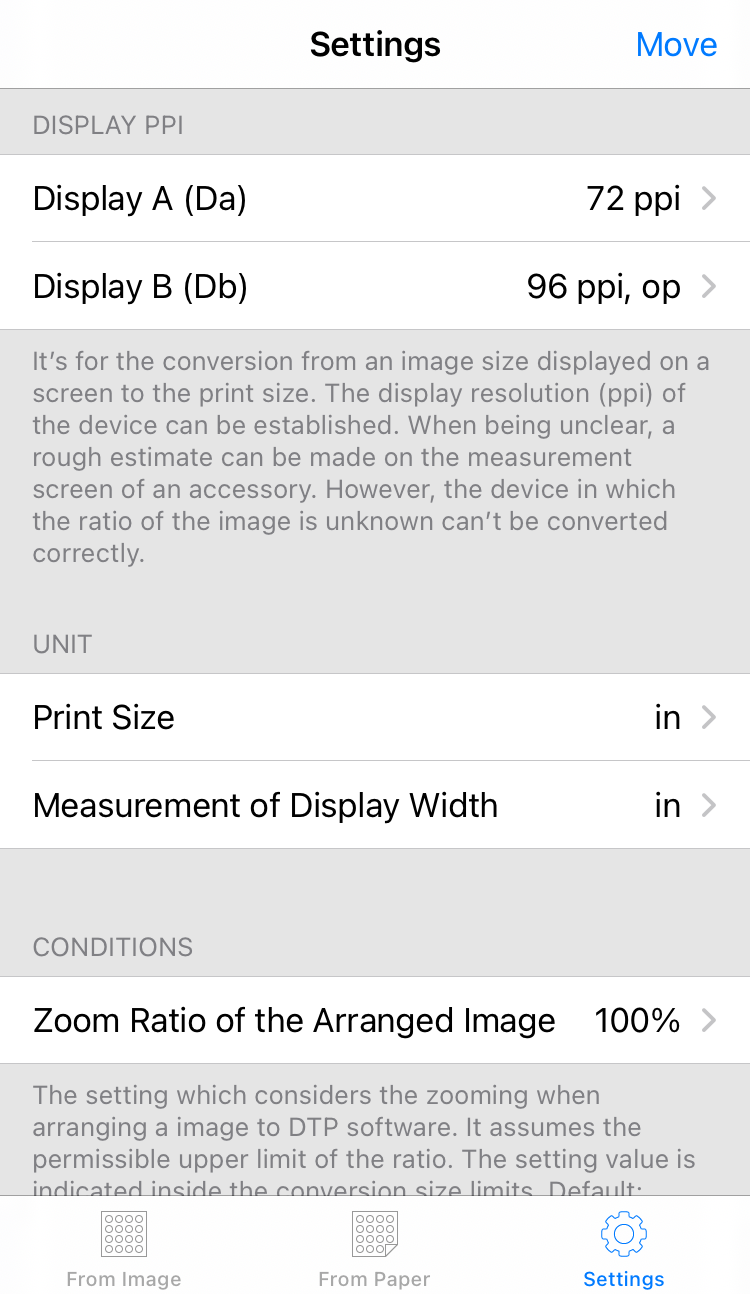
(1) Select "Settings" in the lower tab menu. Scroll down to "DISPLAY PPI". Select the second item of "DISPLAY PPI". This option is only for this item.<br />
<img src="https://app.ognet.jp/img/screen_23e_26.png" class="pict" alt="screen_23e_26.png" title="screen_23e_26.png" width="320" border="0">
</p>

<p>
(2) Turn on "Use as a Conversion Target" in option item.<br />
<img src="https://app.ognet.jp/img/screen_23e_34.png" class="pict" alt="screen_23e_34.png" title="screen_23e_34.png" width="320" border="0">
</p>

<p>
(3) When this option is on, it is also displayed in the setting list.<br />
<img src="https://app.ognet.jp/img/screen_23e_35.png" class="pict" alt="screen_23e_35.png" title="screen_23e_35.png" width="320" border="0">
</p>

<p>
(4) For example, 375 pixels will be 3.9 inches on a 96 ppi display.<br />
<img src="https://app.ognet.jp/img/screen_23e_36.png" class="pict" alt="screen_23e_36.png" title="screen_23e_36.png" width="320" border="0">
</p>
]]></content>
	</entry>
	<entry>
		<title>Settings: Display ppi</title>
		<link rel="alternate" type="text/html" href="https://app.ognet.jp/log/en/eid116.html" />
		<id>https://app.ognet.jp/log/en/eid116.html</id>
		<issued>2022-10-17T23:44:26+09:00</issued>
		<modified>2022-10-17T14:44:26Z</modified>
		<summary>(1) Select &quot;Settings&quot; in the lower tab menu. Scroll down to &quot;DISPLAY PPI&quot;. Tap the item you want to change.(2) The procedure for changing the name is the same as for &quot;Print dpi&quot;. Select the resolut...</summary>
		<author>
			<name>ognet</name>
		</author>
		<dc:subject>PixelConverter en</dc:subject>
		<content mode="escaped" type="text/html" xml:lang="ja"><![CDATA[
<p>
(1) Select "Settings" in the lower tab menu. Scroll down to "DISPLAY PPI". Tap the item you want to change.<br />
<img src="https://app.ognet.jp/img/screen_23e_26.png" class="pict" alt="screen_23e_26.png" title="screen_23e_26.png" width="320" border="0">
</p>

<p>
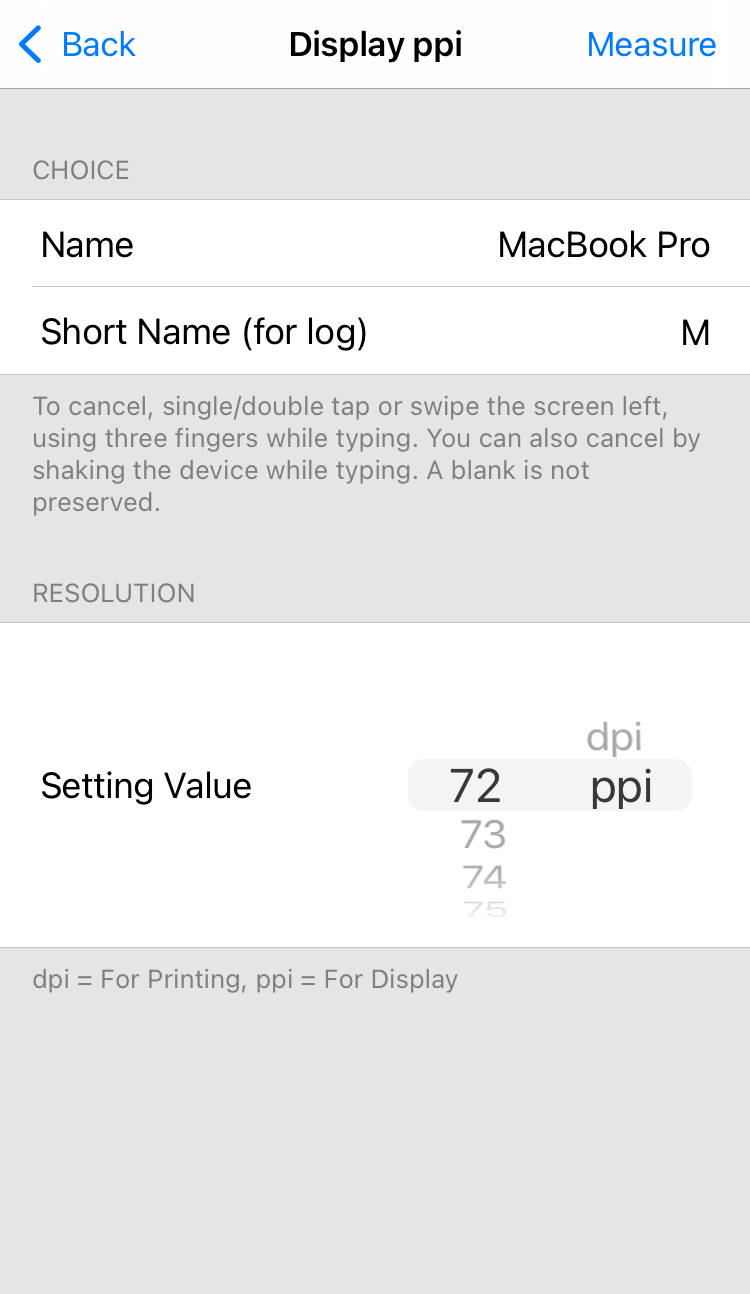
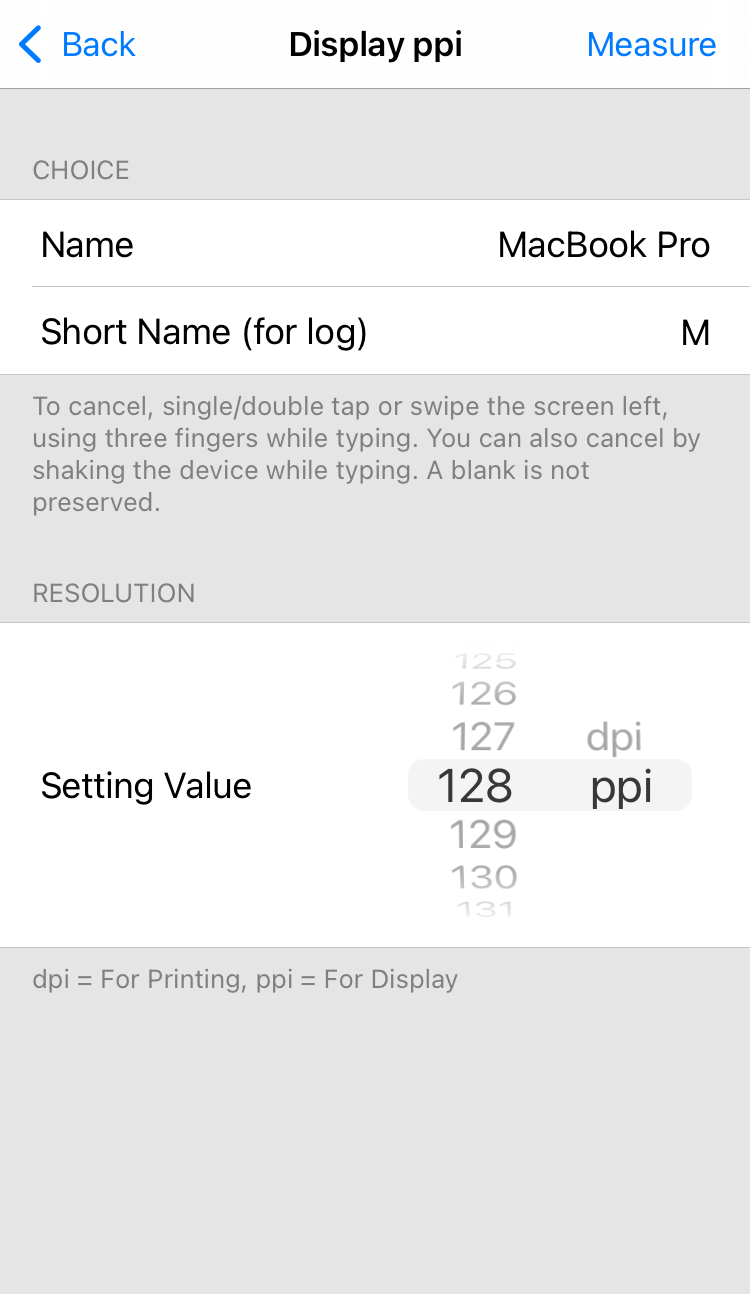
(2) The procedure for changing the name is the same as for "<a href="http://app.ognet.jp/log/en/eid115.html">Print dpi</a>". Select the resolution with the picker.<br />
<img src="https://app.ognet.jp/img/screen_23e_27.png" class="pict" alt="screen_23e_27.png" title="screen_23e_27.png" width="320" border="0">
</p>

<p>
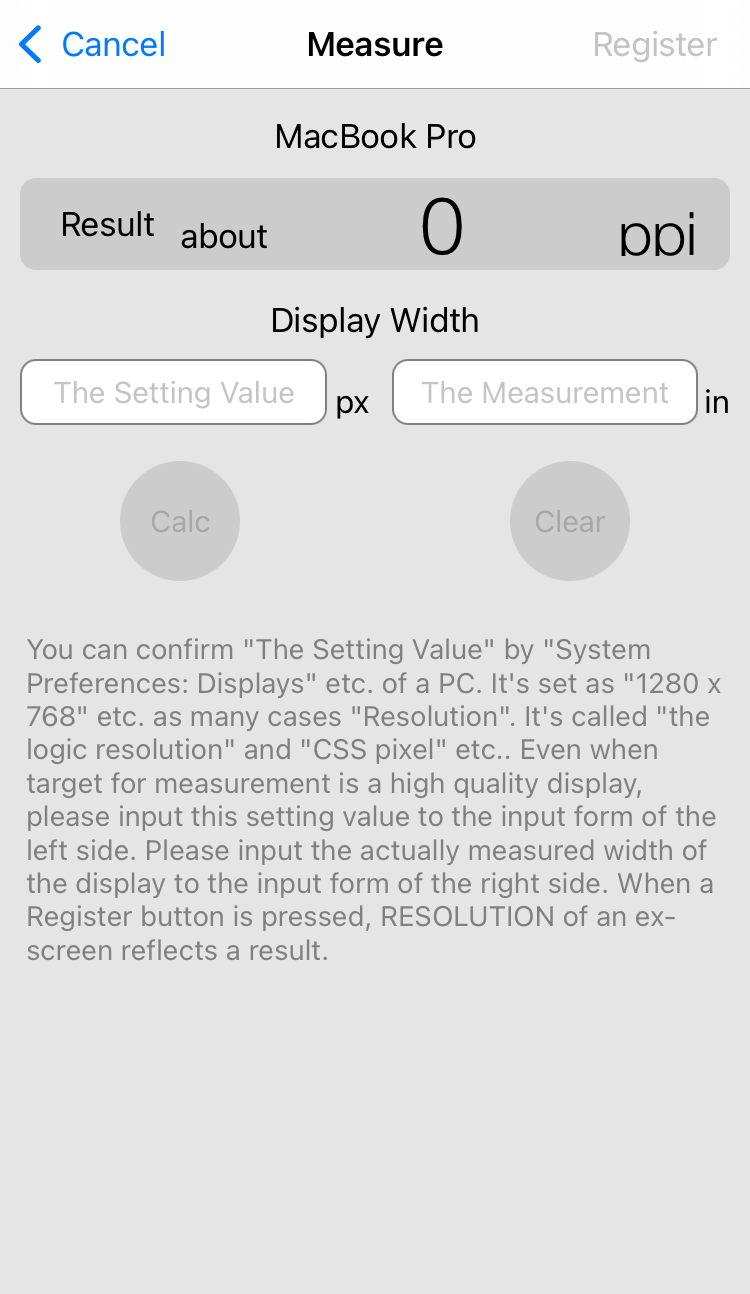
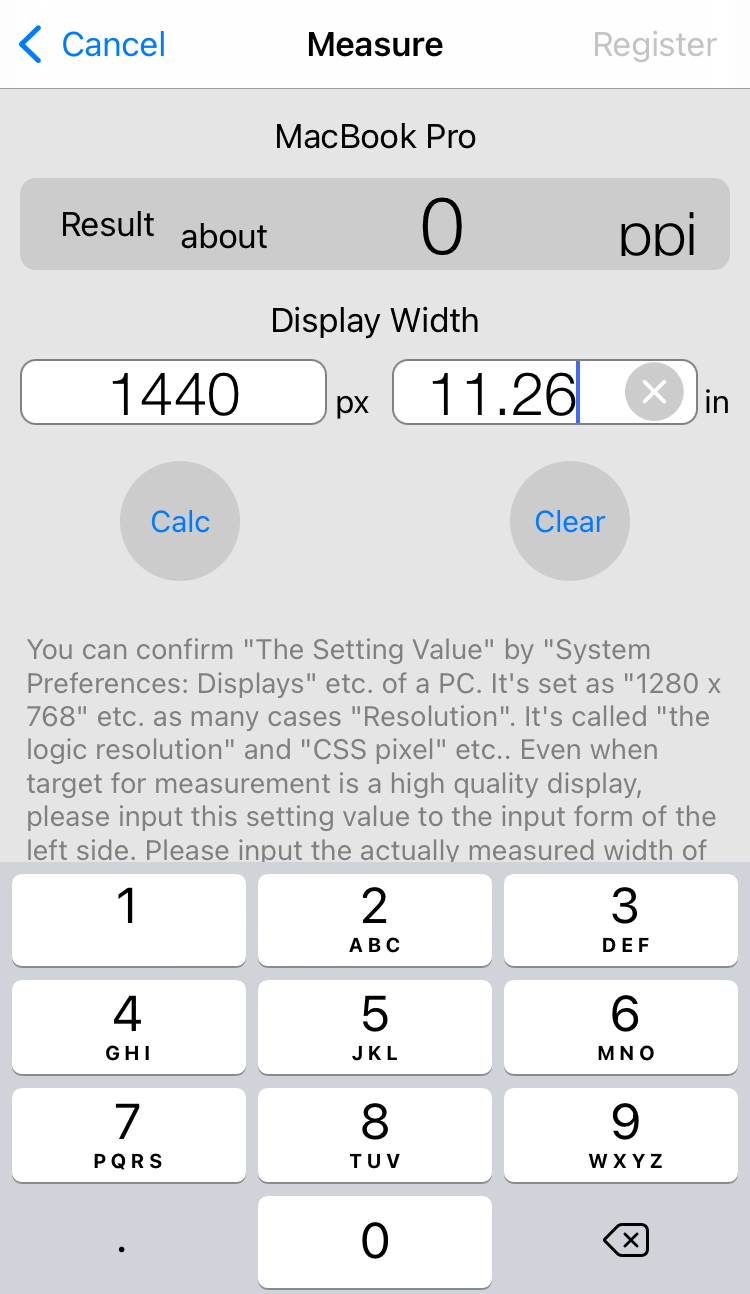
(3) You can measure when the resolution is unknown. Tap "Measure" button on the top navigation bar to open the Measure screen.<br />
<img src="https://app.ognet.jp/img/screen_23e_28.png" class="pict" alt="screen_23e_28.png" title="screen_23e_28.png" width="320" border="0">
</p>

<p>
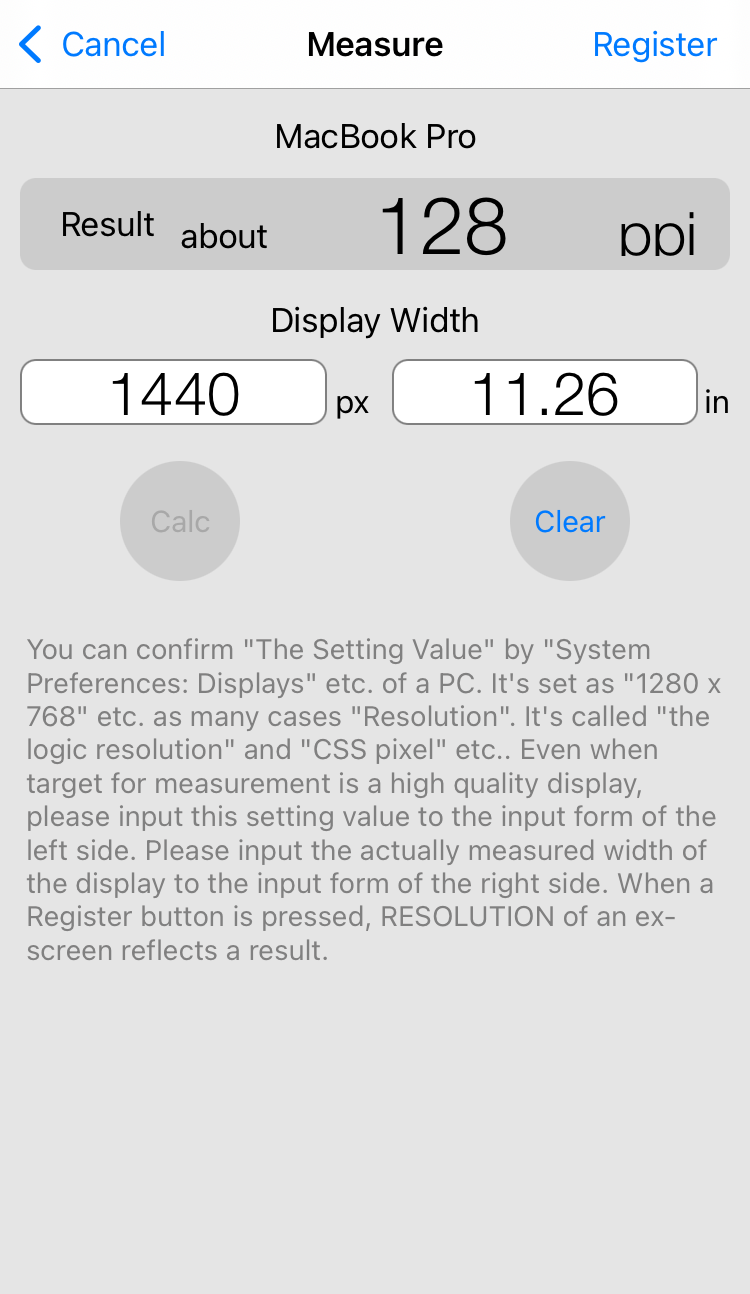
(4) Enter the setting value and actual measurement result on the display width in two input forms. Tap "Calc" button to calculate display resolution.<br />
<img src="https://app.ognet.jp/img/screen_23e_29.png" class="pict" alt="screen_23e_29.png" title="screen_23e_29.png" width="320" border="0">
</p>

(5) Tap "Register" button on the right side of the top navigation bar. Calculation result is reflected in the resolution picker of the previous screen.
<img src="https://app.ognet.jp/img/screen_23e_30.png" class="pict" alt="screen_23e_30.png" title="screen_23e_30.png" width="320" border="0">
<div style="text-align:center;">↓</div>
<img src="https://app.ognet.jp/img/screen_23e_31.png" class="pict" alt="screen_23e_31.png" title="screen_23e_31.png" width="320" border="0">

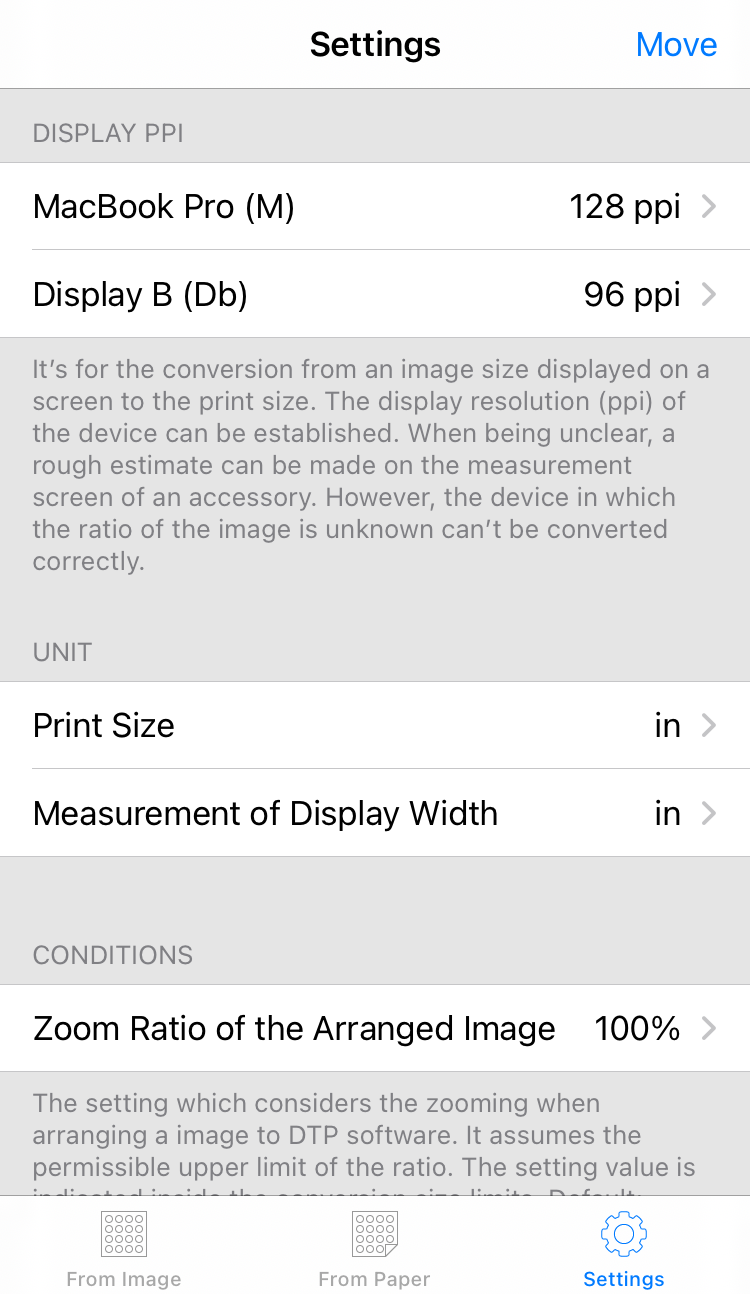
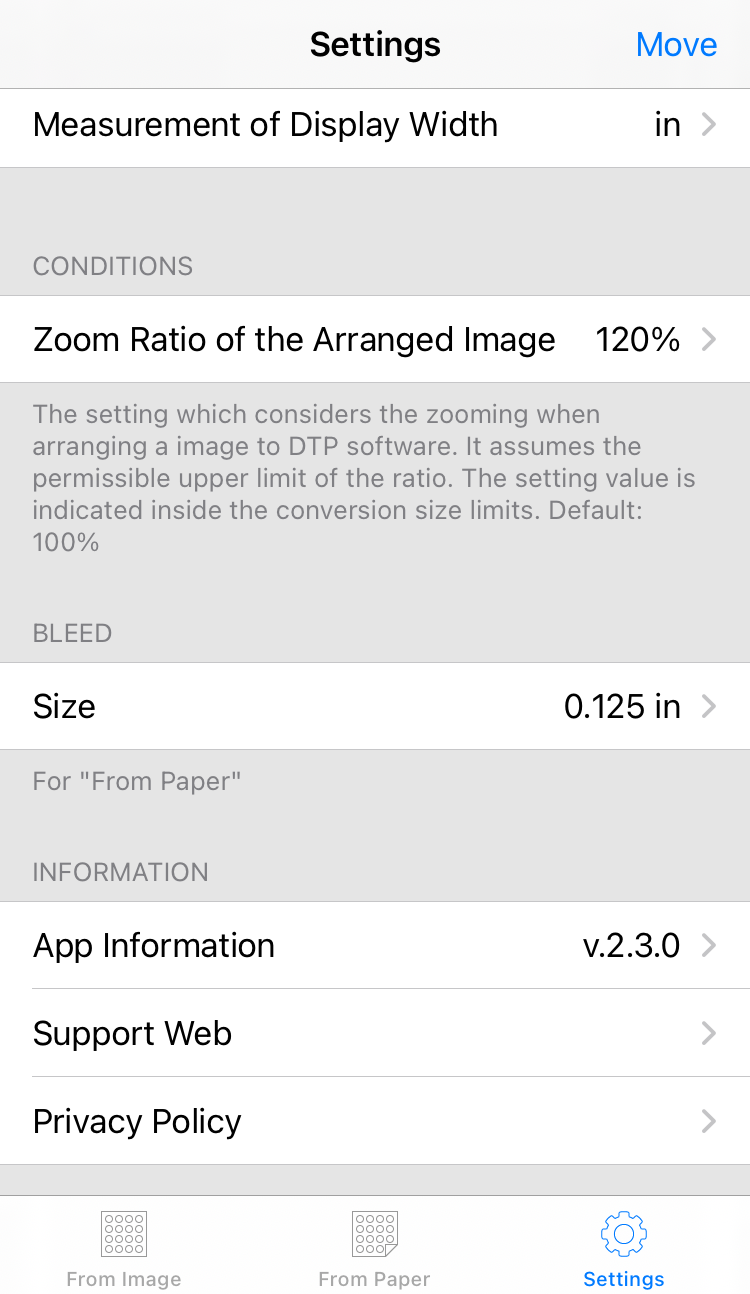
(6) Go back to the Settings screen and confirm the change is reflected.
<img src="https://app.ognet.jp/img/screen_23e_32.png" class="pict" alt="screen_23e_32.png" title="screen_23e_32.png" width="320" border="0">
<div style="text-align:center;">Screen of "From Image"</div>
<img src="https://app.ognet.jp/img/screen_23e_33.png" class="pict" alt="screen_23e_33.png" title="screen_23e_33.png" width="320" border="0">
]]></content>
	</entry>
	<entry>
		<title>Settings: Print dpi</title>
		<link rel="alternate" type="text/html" href="https://app.ognet.jp/log/en/eid115.html" />
		<id>https://app.ognet.jp/log/en/eid115.html</id>
		<issued>2022-10-17T23:44:21+09:00</issued>
		<modified>2022-10-17T14:44:21Z</modified>
		<summary>(1) Select &quot;Settings&quot; in the lower tab menu. Tap the item you want to change.(2) All item can be changed. Select the resolution with the picker.(3) To change the name, tap the settings of name and ...</summary>
		<author>
			<name>ognet</name>
		</author>
		<dc:subject>PixelConverter en</dc:subject>
		<content mode="escaped" type="text/html" xml:lang="ja"><![CDATA[
<p>
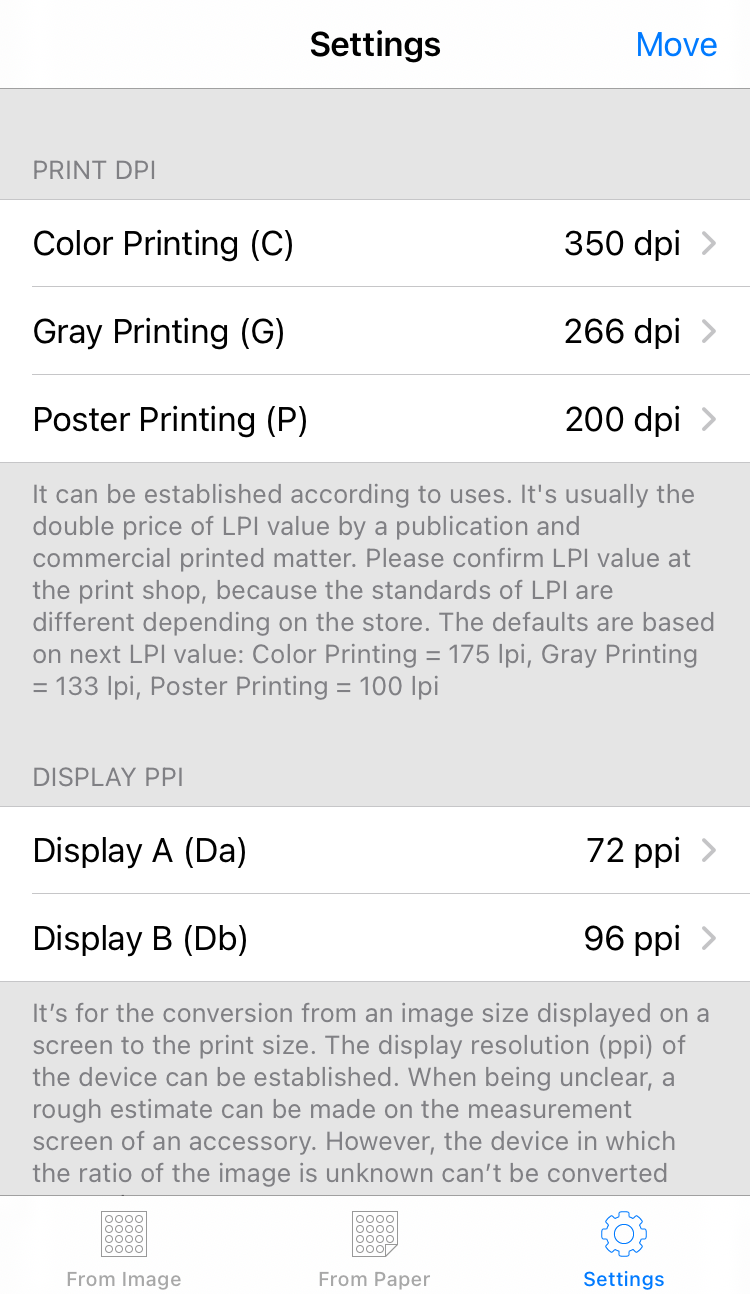
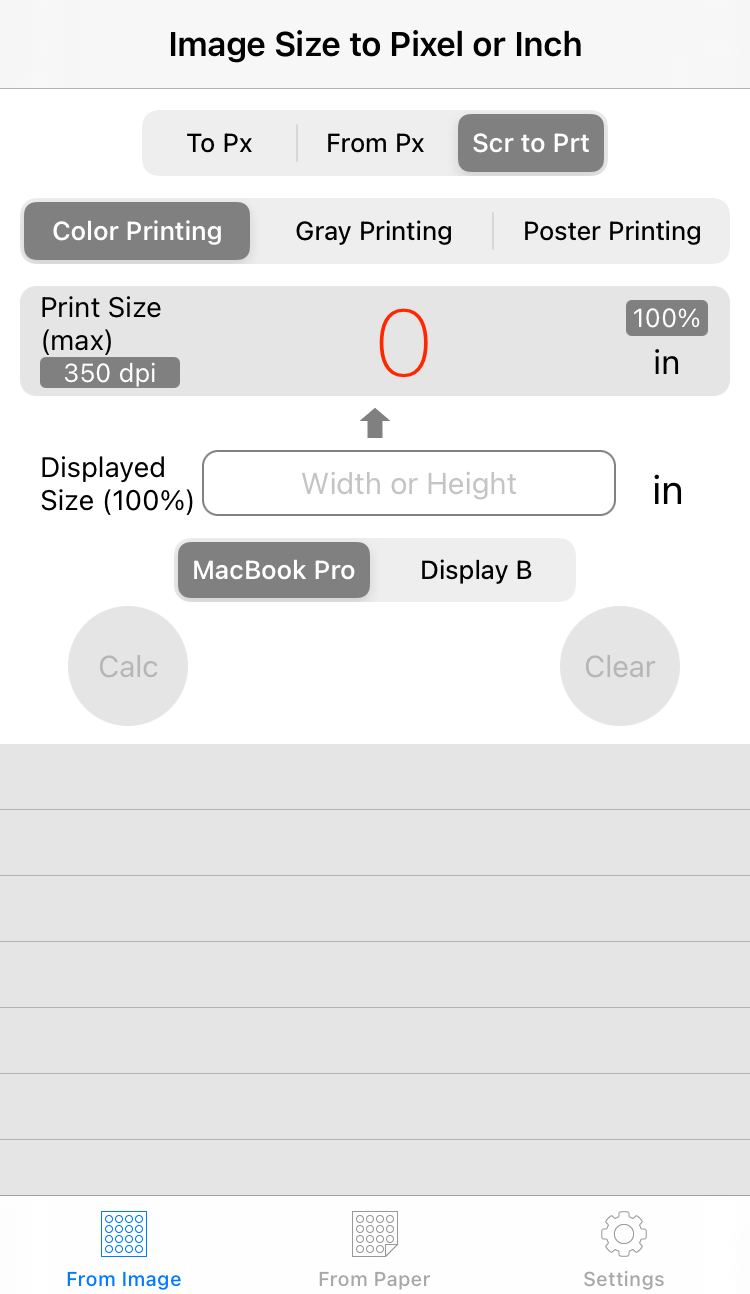
(1) Select "Settings" in the lower tab menu. Tap the item you want to change.<br />
<img src="https://app.ognet.jp/img/screen_23e_03.png" class="pict" alt="screen_23e_03.png" title="screen_23e_03.png" width="320" border="0">
</p>

<p>
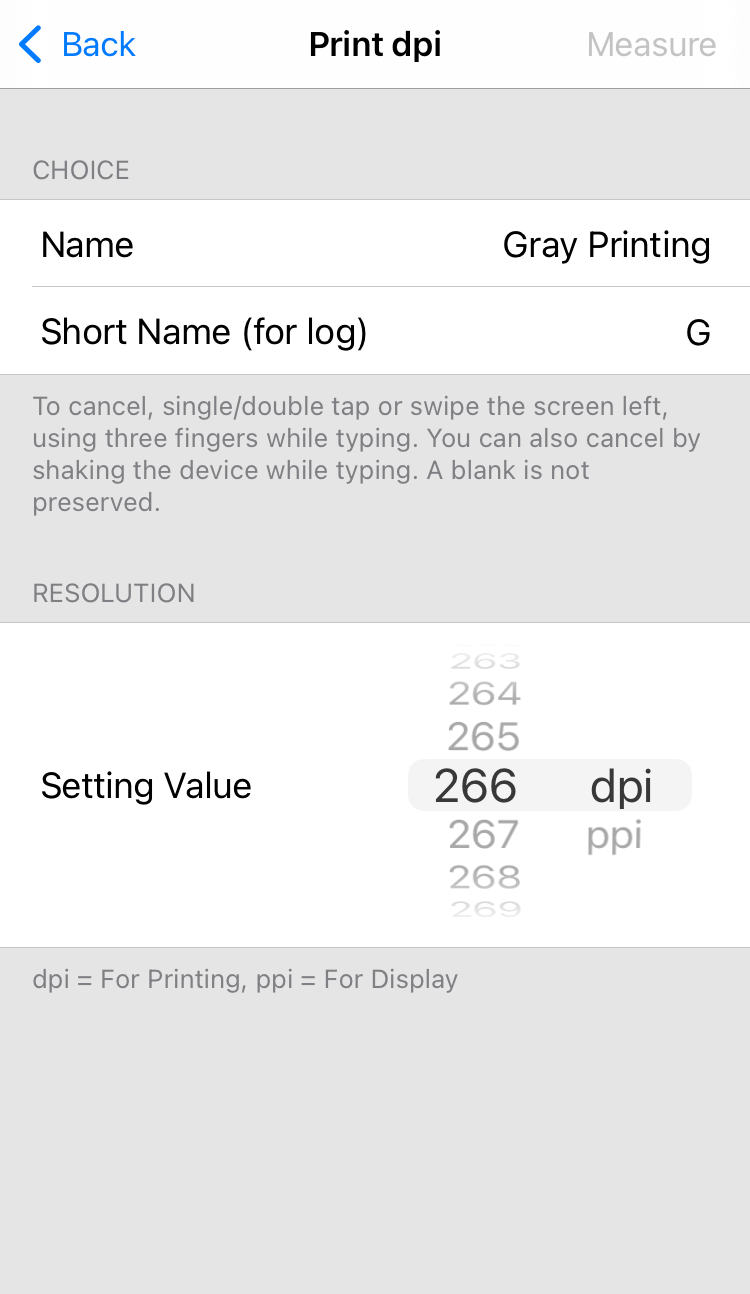
(2) All item can be changed. Select the resolution with the picker.<br />
<img src="https://app.ognet.jp/img/screen_23e_18.png" class="pict" alt="screen_23e_18.png" title="screen_23e_18.png" width="320" border="0">
</p>

<p>
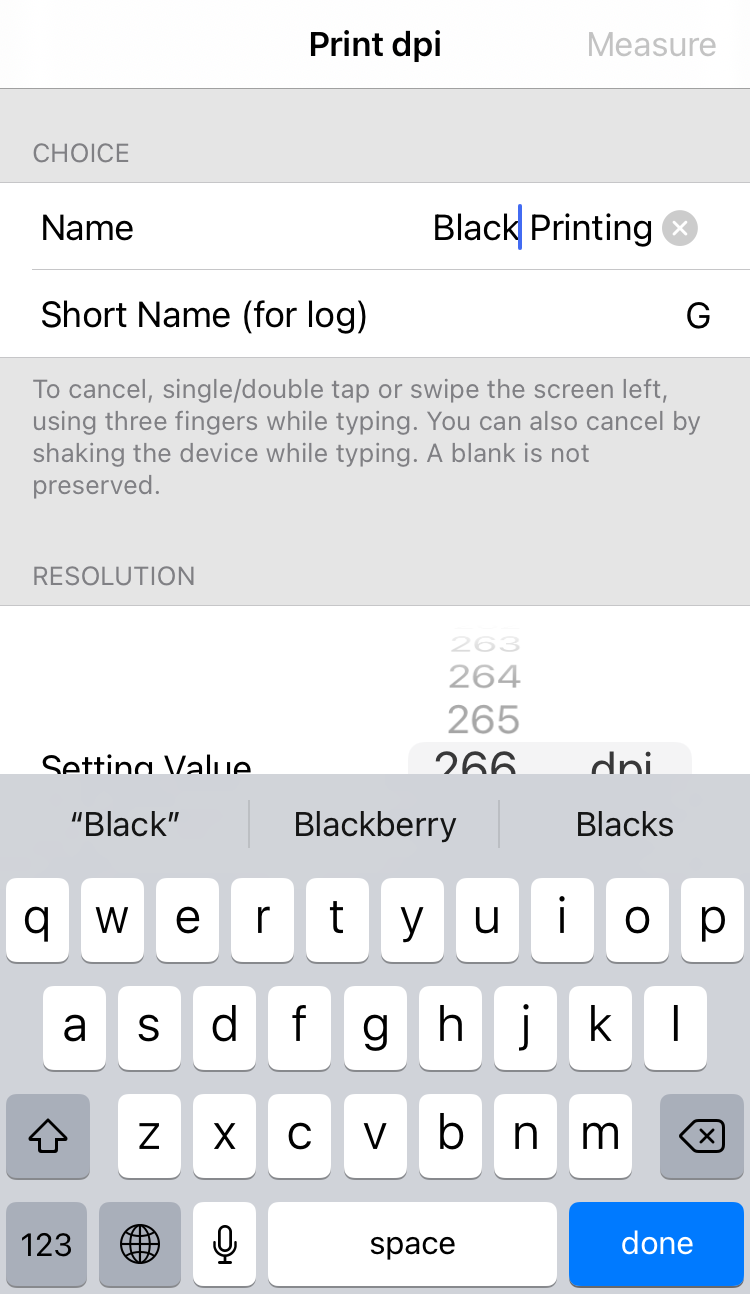
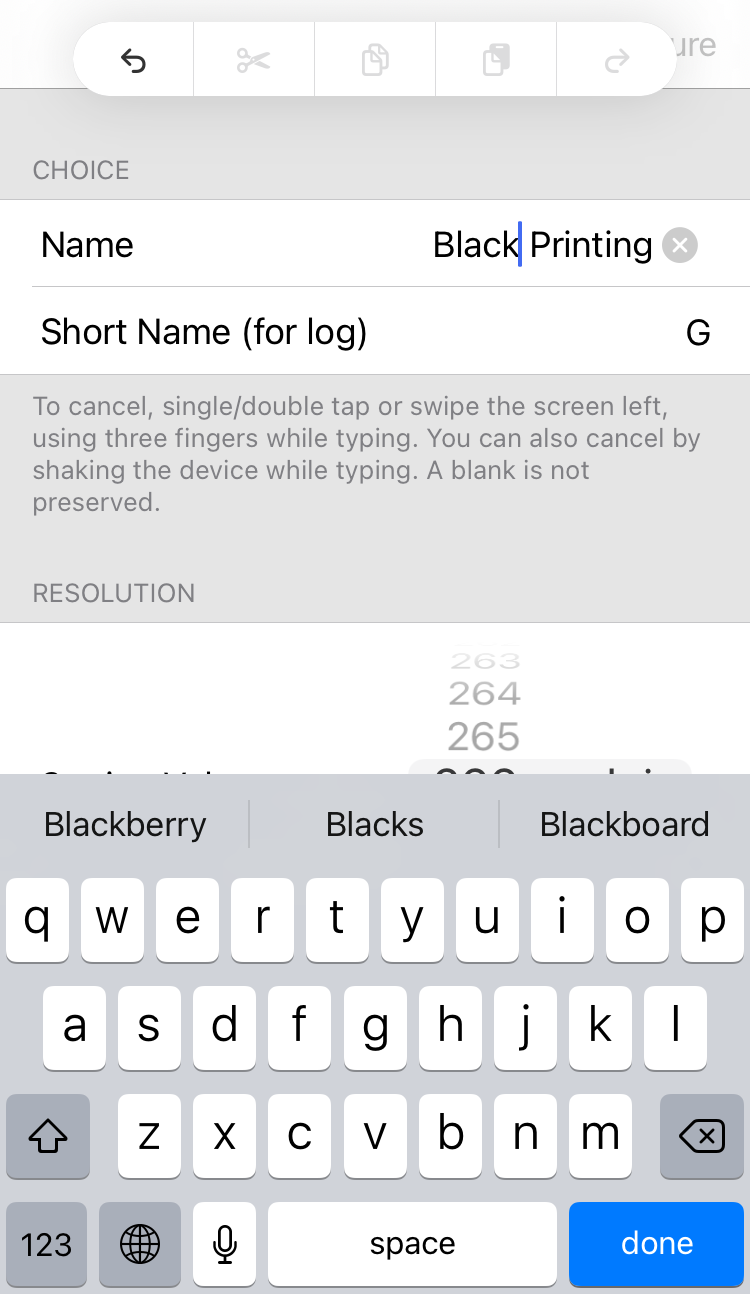
(3) To change the name, tap the settings of name and short name respectively, enter from the keyboard,<br />
<img src="https://app.ognet.jp/img/screen_23e_19.png" class="pict" alt="screen_23e_19.png" title="screen_23e_19.png" width="320" border="0">
</p>

<p>
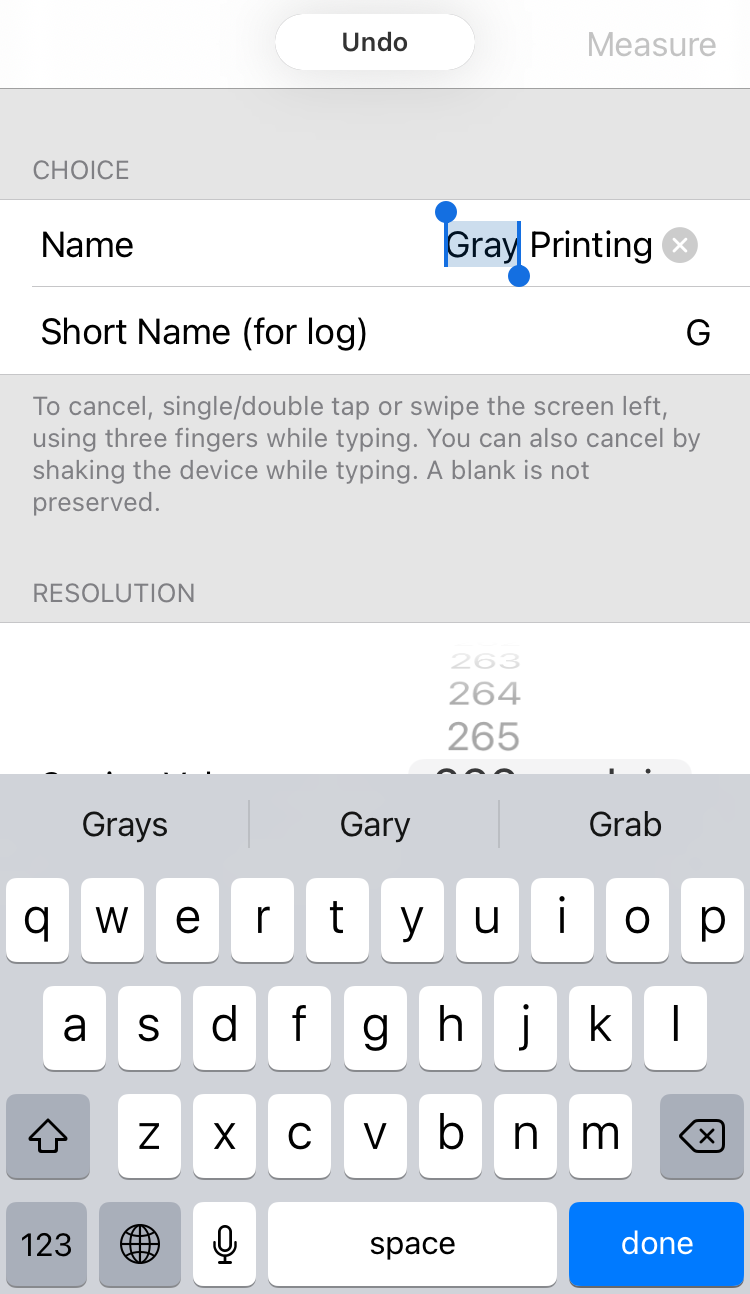
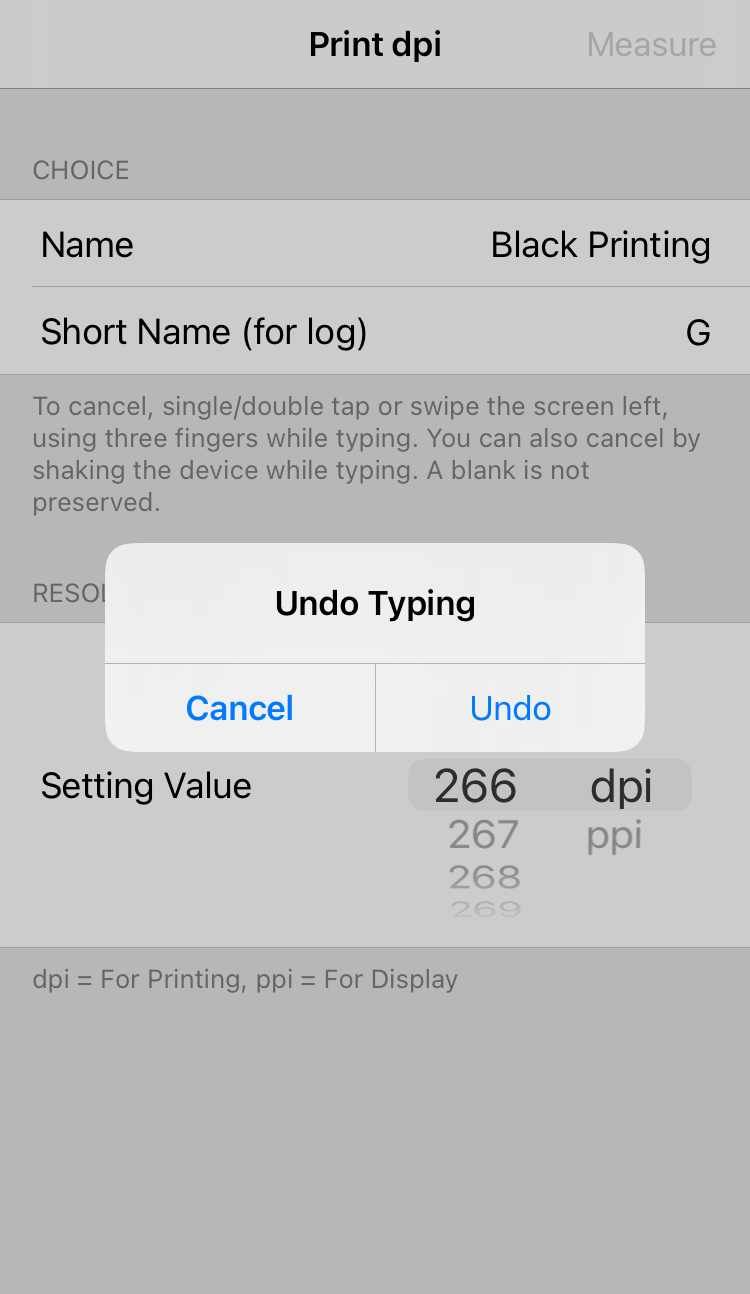
(4) To cancel, swipe left with three fingers while typing.<br />
<img src="https://app.ognet.jp/img/screen_23e_20.png" class="pict" alt="screen_23e_20.png" title="screen_23e_20.png" width="320" border="0"><br />
If you tap with three fingers while typing, the edit menu including undo will be displayed at the top.<br />
<img src="https://app.ognet.jp/img/screen_23e_21.png" class="pict" alt="screen_23e_21.png" title="screen_23e_21.png" width="320" border="0"><br />
If "Shake to Undo" in Accessibility (Accessibility -> Touch for iOS 13 or later) is turned on in the device settings screen, shake the device to cancel.<br />
<img src="https://app.ognet.jp/img/screen_23e_22.png" class="pict" alt="screen_23e_22.png" title="screen_23e_22.png" width="320" border="0">
</p>

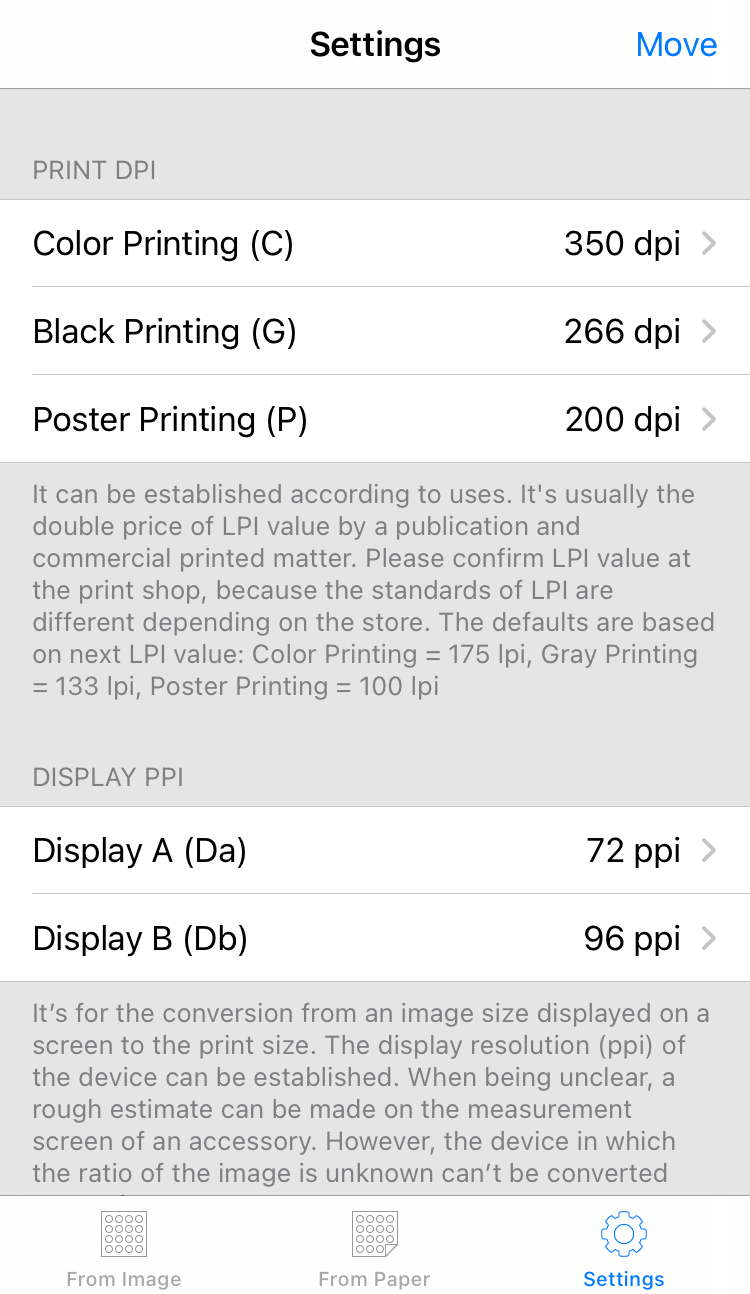
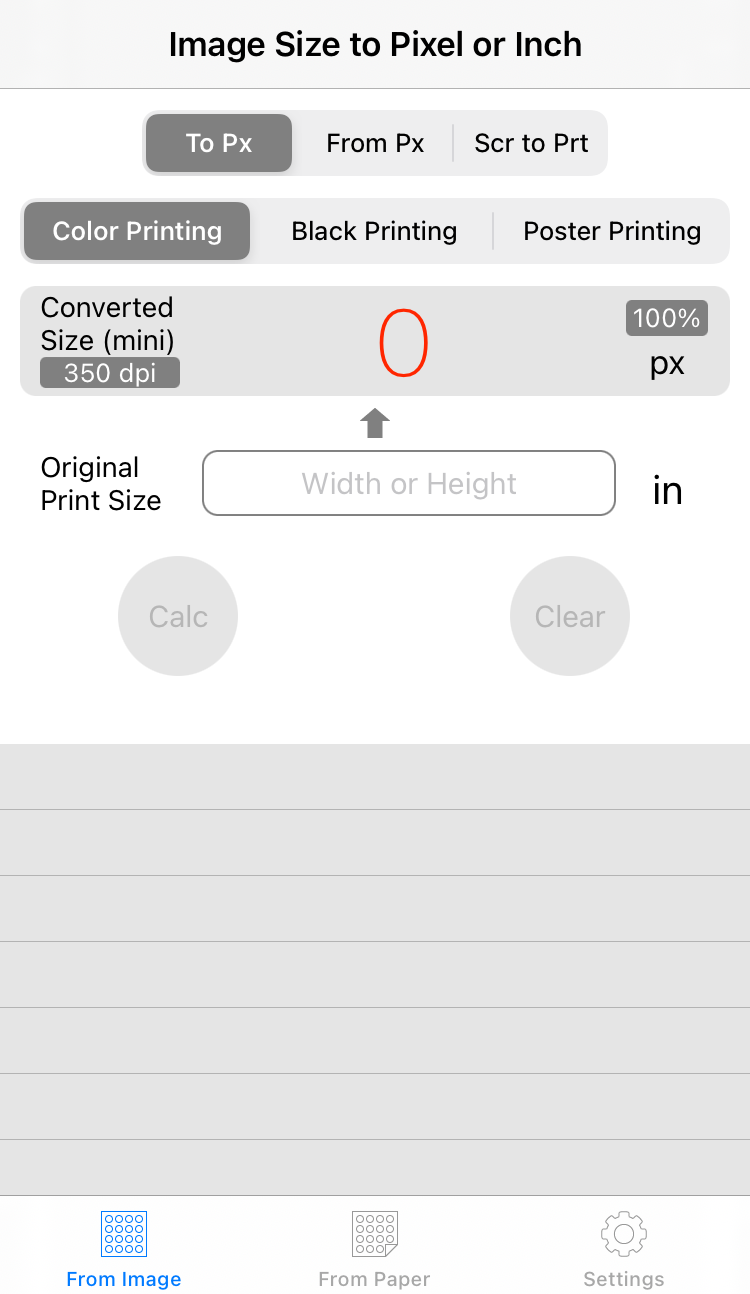
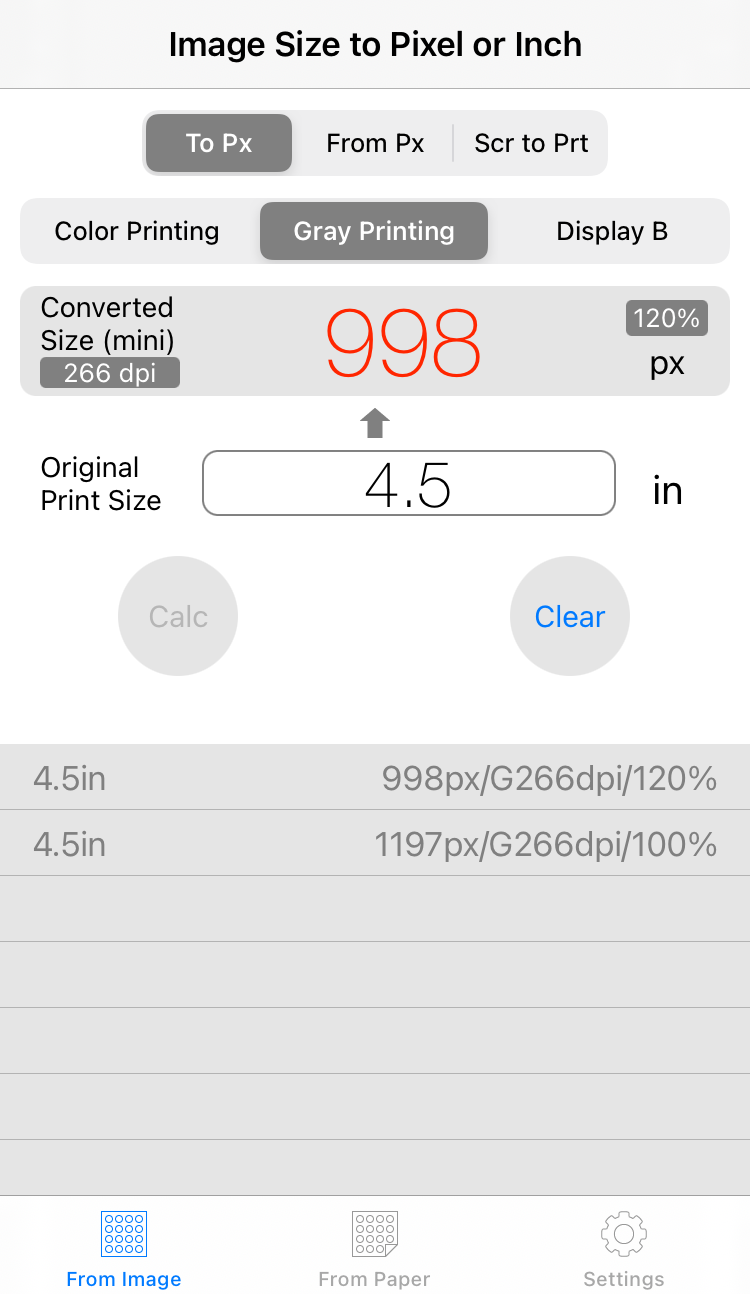
(5) Go back to the Settings screen and confirm the change is reflected.
<img src="https://app.ognet.jp/img/screen_23e_23.png" class="pict" alt="screen_23e_23.png" title="screen_23e_23.png" width="320" border="0">
<div style="text-align:center;">Screen of "From Image"</div>
<img src="https://app.ognet.jp/img/screen_23e_24.png" class="pict" alt="screen_23e_24.png" title="screen_23e_24.png" width="320" border="0">
<div style="text-align:center;">Screen of "From Paper"</div>
<img src="https://app.ognet.jp/img/screen_23e_25.png" class="pict" alt="screen_23e_25.png" title="screen_23e_25.png" width="320" border="0">
]]></content>
	</entry>
	<entry>
		<title>Paper Size to Pixel</title>
		<link rel="alternate" type="text/html" href="https://app.ognet.jp/log/en/eid114.html" />
		<id>https://app.ognet.jp/log/en/eid114.html</id>
		<issued>2022-10-17T23:44:17+09:00</issued>
		<modified>2022-10-17T14:44:17Z</modified>
		<summary>Convert the paper size to the minimum required pixel value to print the image.(1) Select &quot;From Paper&quot; in the lower tab menu. The initial value is already displayed there.(2) If you select paper siz...</summary>
		<author>
			<name>ognet</name>
		</author>
		<dc:subject>PixelConverter en</dc:subject>
		<content mode="escaped" type="text/html" xml:lang="ja"><![CDATA[
<p>
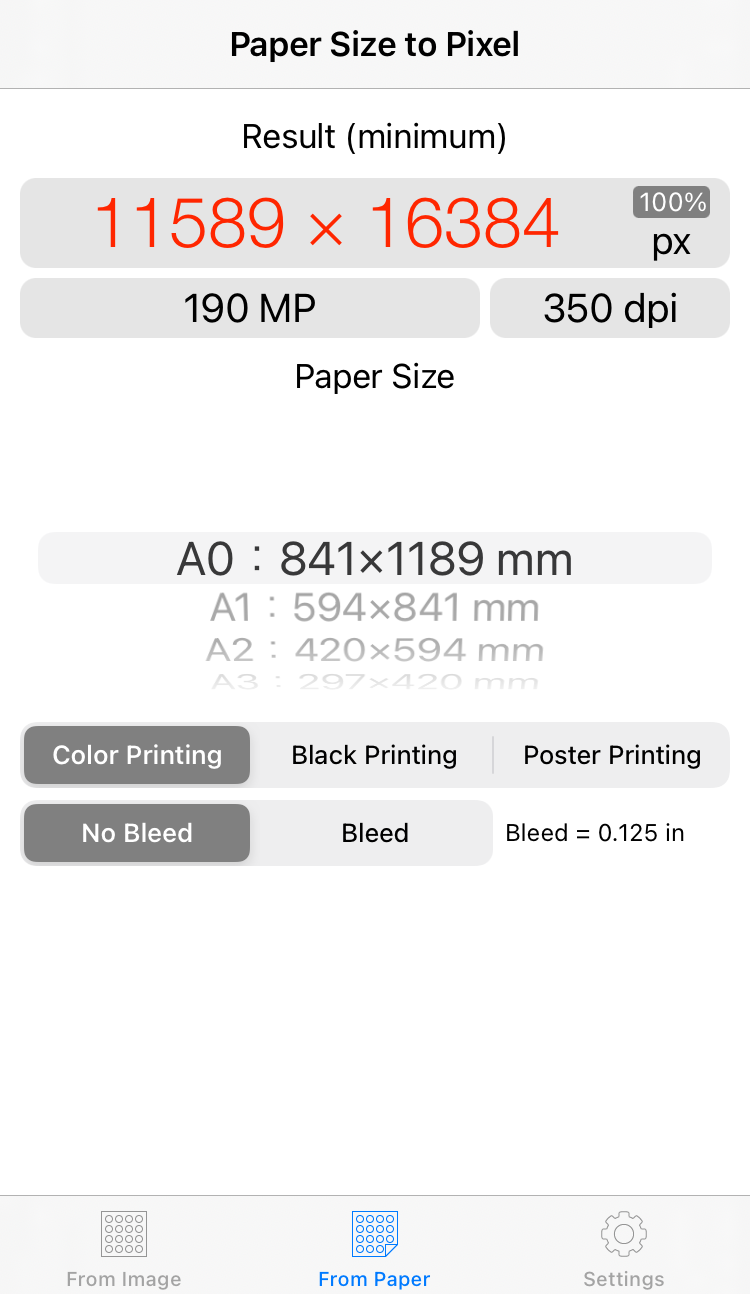
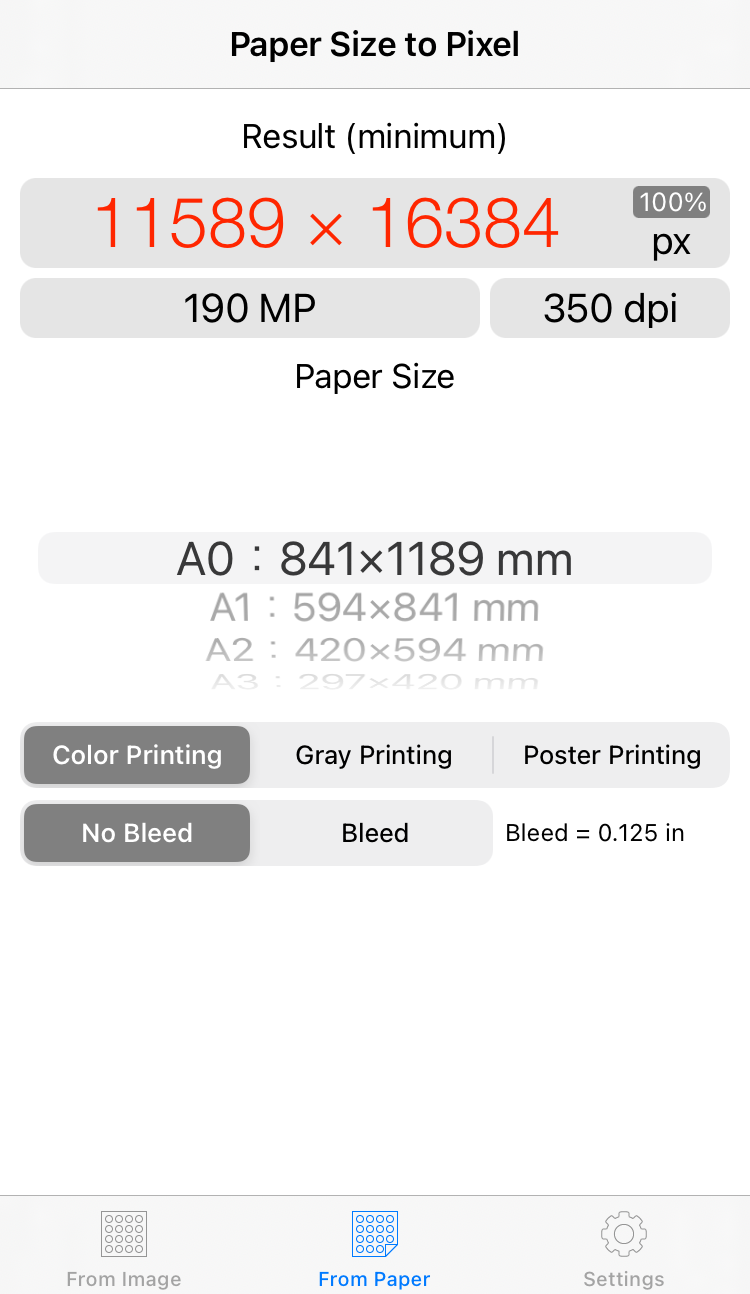
Convert the paper size to the minimum required pixel value to print the image.
</p>

<p>
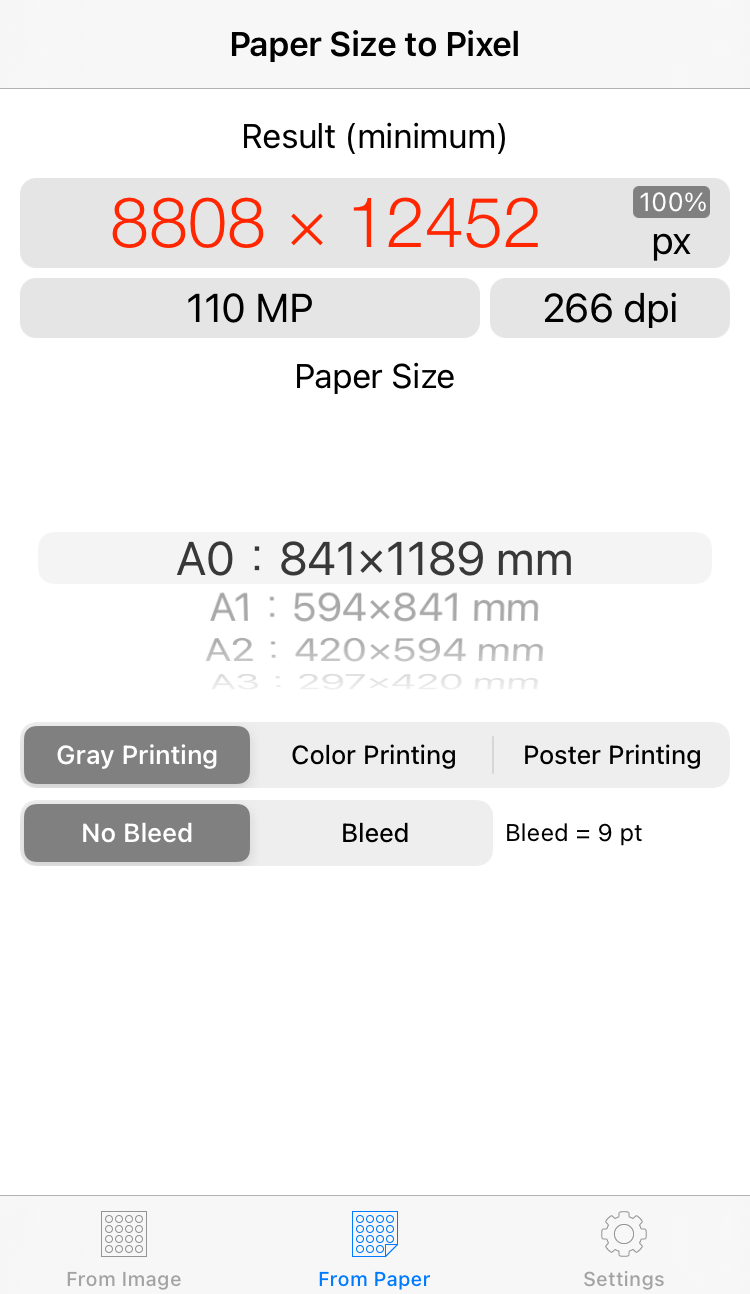
(1) Select "From Paper" in the lower tab menu. The initial value is already displayed there.<br />
<img src="https://app.ognet.jp/img/screen_23e_02.png" class="pict" alt="screen_23e_02.png" title="screen_23e_02.png" width="320" border="0">
</p>

<p>
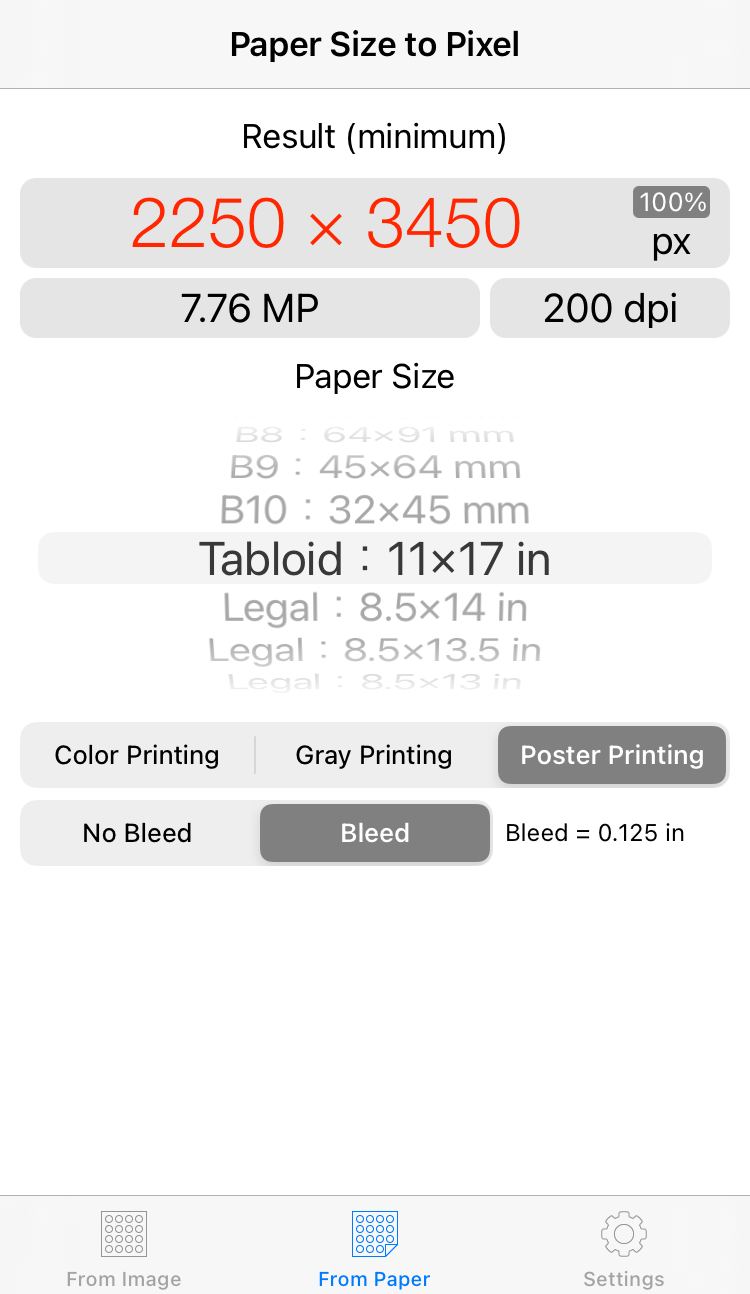
(2) If you select paper size with picker, recalculate each time. Even if you change the print type or whether bleed is present or not, recalculate each time.<br />
<img src="https://app.ognet.jp/img/screen_23e_17.png" class="pict" alt="screen_23e_17.png" title="screen_23e_17.png" width="320" border="0">
</p>

<p>
- Printing resolution affects conversion. <a href="http://app.ognet.jp/log/en/eid115.html">You can change the printing resolution on the Settings screen.</a><br />
- You can set the zoom ratio of the arranged image to DTP software as calculation conditions (v.1.2 or later). <a href="http://app.ognet.jp/log/en/eid119.html">You can change this on the Settings screen.</a><br />
- The conversion result is the minimum value. It's OK if it's bigger than this. The result is displayed as an integer value rounded up to the nearest whole number, because pixel is the smallest unit of screen display.
</p>
]]></content>
	</entry>
</feed>